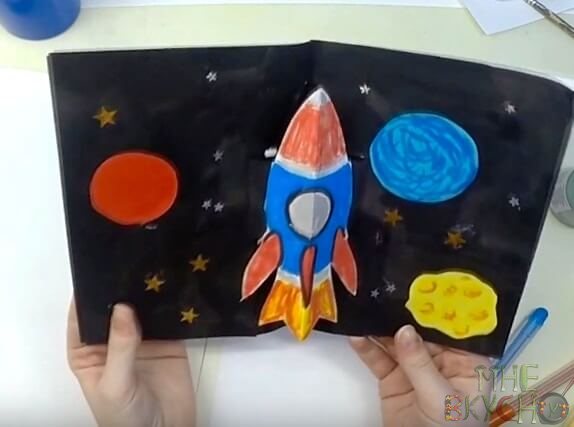
Step-by-step 3D postcard in the form of a rocket
If you have never created three-dimensional postcards, here is a step-by-step method for you. Again, everything is as simple as two and two. Templates can be found at the end of my post.
We need:
- A blank sheet of paper A4;
- The pencil is simple;
- Scissors;
- Colored paper;
- Glue;
- Gouache paints.
Manufacturing:
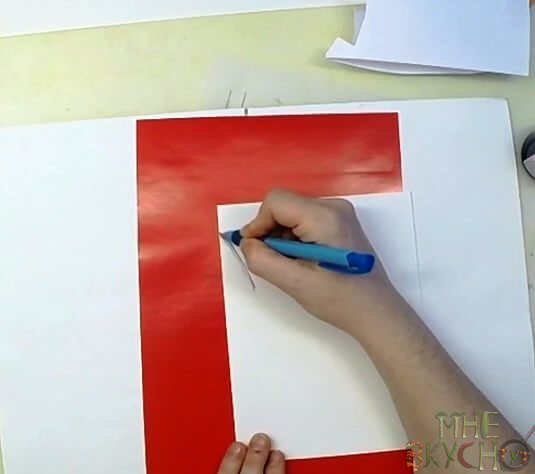
1. Fold the A4 sheet in half. On the fold we draw half a rocket.
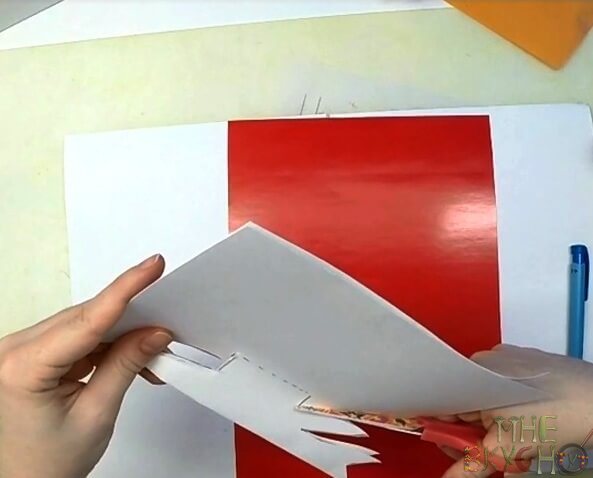
2. Part of the rocket in the photo below is marked with a dotted line. This means that we will not cut here. And we will cut out all the straight lines using scissors.
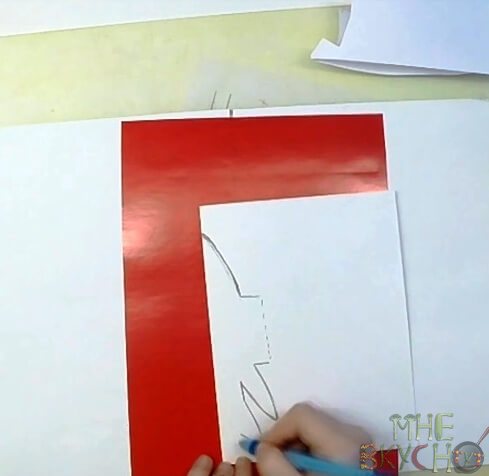
3. We try to do everything as carefully as possible.
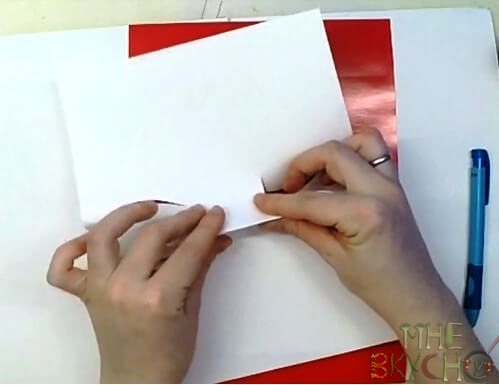
4. We turn our spaceship inside. It will fold inward and the entire card will fold outward.
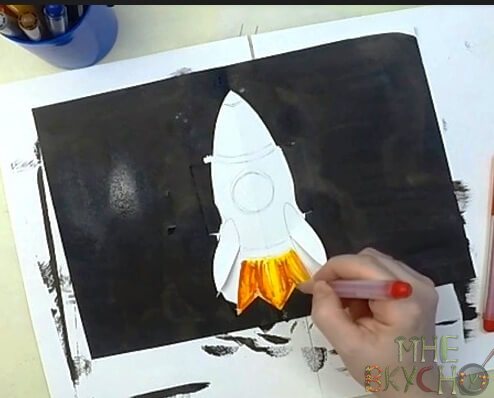
5. Draw the details of the ship: nozzles, porthole, nose and flame below.

6. Paint the background black with gouache. And the rocket itself in suitable colors.
Here you can get creative and make an astronaut’s face in the porthole window.
7. Draw beautiful flames.
8. Cut out different planets from colored paper. We glue them all over the background. You can also make stars from foil.
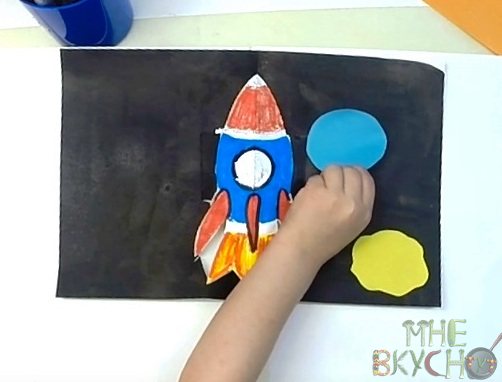
Voila! Our cool three-dimensional card is ready. We give it away for its intended purpose.
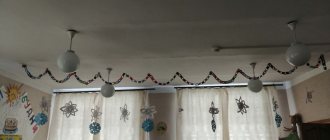
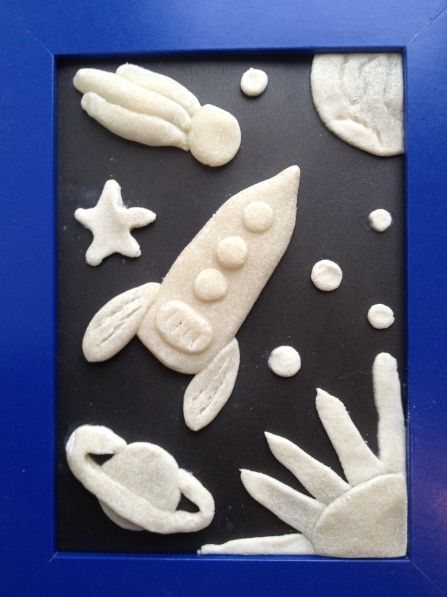
Starry sky
The starry sky in the background is the main general feature of space-themed applications. You can make such a background very simply, using a sheet of black cardboard, white paint and a brush. A sheet of black cardboard will be used as a backing. You will need to put stars on it.
A brush to make a lot of small stars will not help us. The paint should be applied in splashes. The necessary fine sprays can be easily done using a small brush with hard bristles; a toothbrush works well for this purpose.
The brush needs to be generously smeared in white paint and rubbed over its bristles with your finger so that splashes are made. To begin with, it is better to practice splashing on rough paper to avoid misunderstandings and unnecessary blots. If everything works out, then you can apply paint to the black cardboard backing.
The starry sky for the application for Cosmonautics Day is ready!
Senior group. Senior preschool age. Children 5-6 years old
Collective application “Understanding the space of space” in the senior group
Dear Colleagues! On April 22, in our group, as in many kindergartens, we talked about Space, about its pioneers. Children read poetry and made up their own stories about Space. We decided to do a collective work on this topic. I suggested depicting the sun as solar...
Lesson notes on the application “Flight to the Moon” in the senior group Lesson notes on Artistic creativity Application “Flight to the Moon”
in the older group. Prepared and conducted by: Tokareva E.P. Goal: To consolidate children's knowledge about space and the moon. Objectives: 1. Clarify children’s ideas about the planet Moon as a satellite of the Earth. 2. Continue to teach children...
Crafts for Cosmonautics Day from bottles
Cool and original products for April 12 can be made from ordinary plastic bottles, just look at these souvenirs:
Alternatively, you can use not the whole bottle, but only the neck, and add a Kinder Surprise egg.
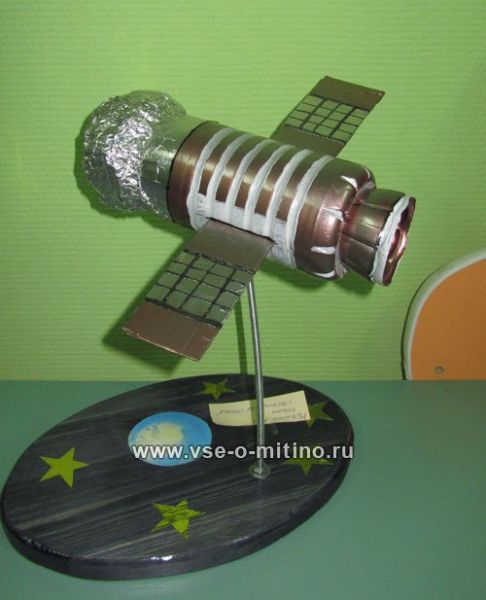
And I suggest you watch a video story from which you will learn how to easily and beautifully make a space satellite.
Space crafts from colored paper and cardboard for kindergarten
And now I want to invite you to make a very simple flying saucer. We will make it from ordinary paper plates; if there are none, you can use plastic or cardboard.
You will need: two paper plates, pencils, markers, paints, glue, brush.
Work process:
1. Take plates and paint them any color. You can immediately take colored plates.
2. After the paint has dried, draw patterns on them with a pencil.
3. Color them with a marker or paints.
4. Then glue them together. Complete the composition with an alien made of plasticine.
You see how easy and fast everything is, and the main thing is that kids can do this kind of work.
And I also selected a couple of options from my favorite materials for creativity (paper and cardboard). Look, choose and show your children, let them make them.
A simple astronaut made from cones!
This work can be done not only from cardboard, but also from felt. And I really like the idea with photographs.
Naturally, do not forget about the applique, prepare templates, cut and glue.
You can also use the origami technique.
Here the option is more complicated, as it requires fine work and knowledge of quilling techniques.
What crafts can you make on the theme of space for school?
Now let's see what we can offer older guys. You can choose the options that we discussed above, or you can think about it and choose from the following.
The image of space is always relevant. Take an empty box, make a background of paints, and glue paper stars. Make planets and hang them on strings.
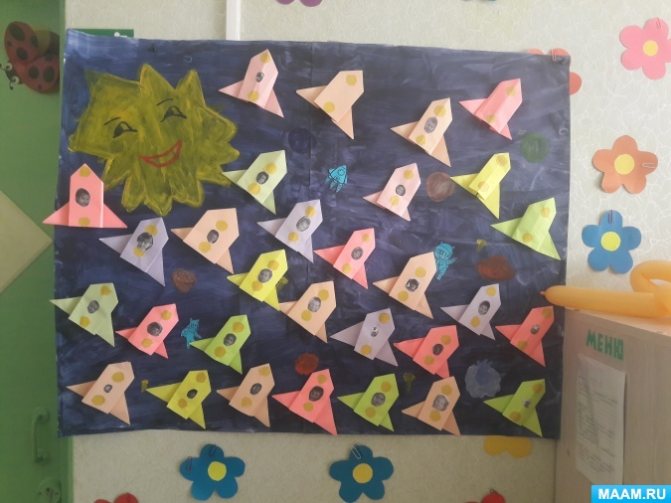
Great teamwork. Make rockets using the origami technique and glue them on.
Cool version of salt dough!!
And look at the cool use of egg molds!!
What do you think of the idea of using a light bulb?!
Well, everything is simple here, schoolchildren can easily cope with such a postcard.
Using a plastic bottle and plasticine.
Here is a whole cosmic composition, a great idea for creativity.
And here are the plasticine masterpieces:
Shine
The glitter will fit very harmoniously into the star theme and add brightness to the craft. They can be used to outline the finished application, highlight some elements of the rocket, or make a beautiful inscription “Happy Cosmonautics Day!”
You can use either ready-made glitter gel from the creativity kit or dry small glitter. In order for the latter to stick well, they will have to be applied using colorless nail polish: first apply a layer of varnish to a small area, and then sprinkle glitter on it, and shake off the excess.
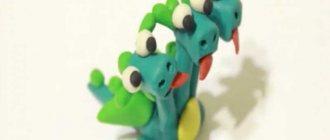
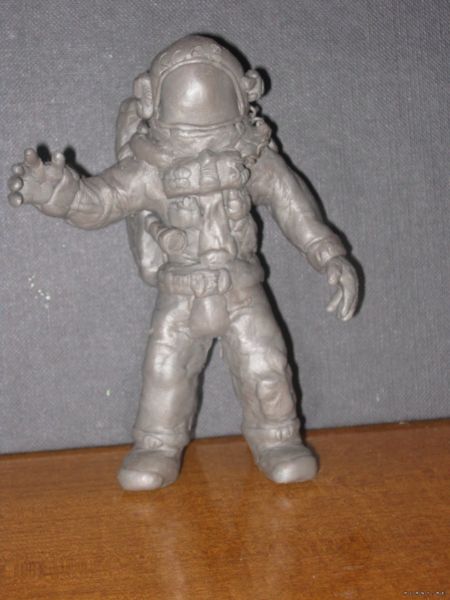
Craft ideas for the competition for April 12, 2022 (from plasticine and salt dough)
Children's favorite materials for creativity have always been and remain plasticine, modeling clay or salt dough. After all, there is a great flight of imagination here and you can create whatever you want!!
- Favorite cartoon characters - dog astronauts))
- Alien in outer space
- Flight of fancy in the open sky
- How do you like such a real astronaut?!
- Various colored aliens
- Planet Conqueror

- Interesting suspension option
- Plasticine masterpieces
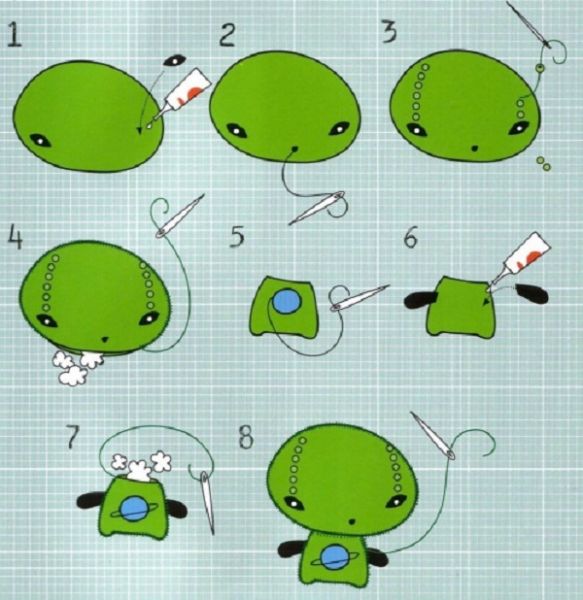
Making souvenirs from felt
And now we’ll sew a green alien. Many people will definitely like this craft.
You will need: green, blue and black felt, green, black and white sewing threads, gold beads No. 10, foam rubber or cotton wool, sewing needle, marker, glue.
Work process:
1. Prepare the templates first and then transfer them onto the fabric.
2. Then follow the step-by-step instructions below to sew the weirdo.
Let's see what else you can create from this wonderful material called felt:
The easiest thing to do is cut out the silhouettes, then glue them onto the background.
For older children, and for those who sew well, of course, voluminous crafts will be advantageous:
The last work will, of course, require the help of adults.
Master class on making a rocket from waste material
A popular craft for this holiday is a rocket. Well, let's see how we can make it too. I found good instructions on the Maam.ru website. I thought this option was cool, since everything is made from simple materials and anyone can do it.
You will need: toilet roll, colored cardboard or paper, scissors, glue, pencil.
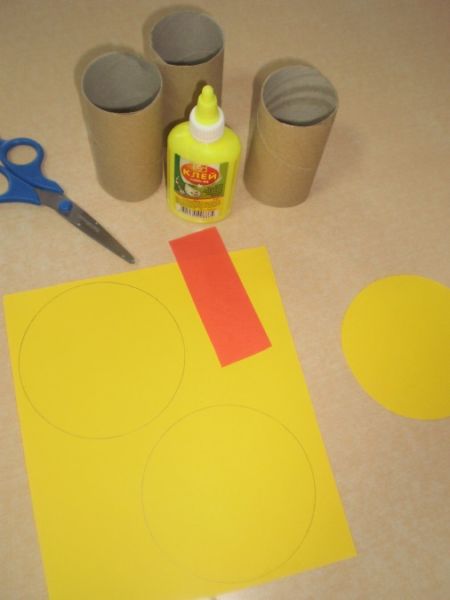
Work process:
1. Cut out a large circle from thick paper or cardboard. Cut out a small triangle from it.
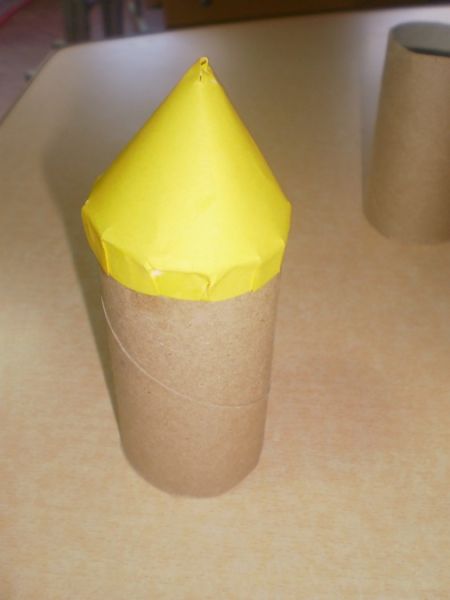
2. Roll into a cone and glue with glue. Then make small cuts around the entire circumference.
3. Glue onto the sleeve.
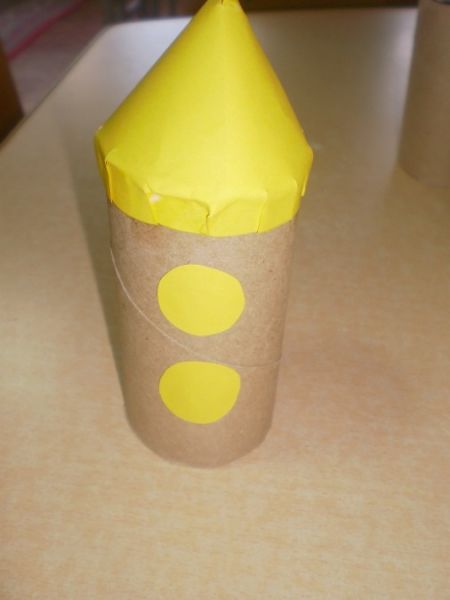
4. Cut out small circles and glue them too, imitating a porthole.
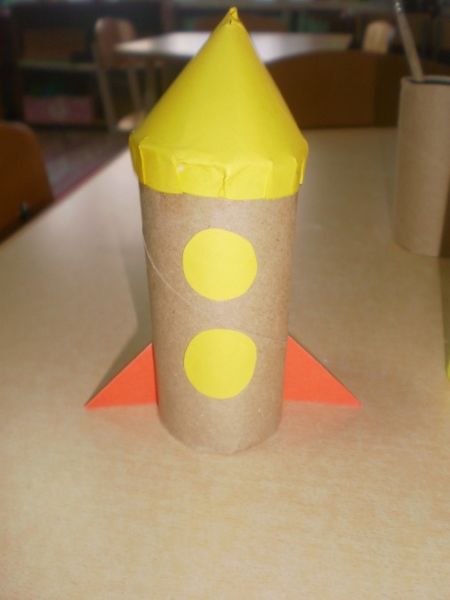
5. Make cuts on both sides of the sleeve.
7. Insert this strip into the prepared slots. The rocket is ready to fly!!
This is how easy and quick a souvenir is to make. Did you like it?!!