Greetings! Today I propose to abstract from cooking and preserving for the winter. The child brought drawings with my image from kindergarten. And I realized that it was time to teach him to draw))) Somehow I don’t want to be without a neck and waist in the drawings.
As a result, I collected enough material for an entire article. I tried to make the techniques as easy as possible, because children will be drawing.
Of course, we won’t go into an in-depth study of portraiture; this is not understandable to all kids and, to be honest, it’s not given to everyone. We just need to show the proportions a little. That the head is not square and it sits on the neck, and not immediately on the body.
In general, some of the ideas below are even suitable for copying from a photo. By the way, I already used them in second grade. I was about 8-9 years old then. Therefore, everything is possible, let's get started.
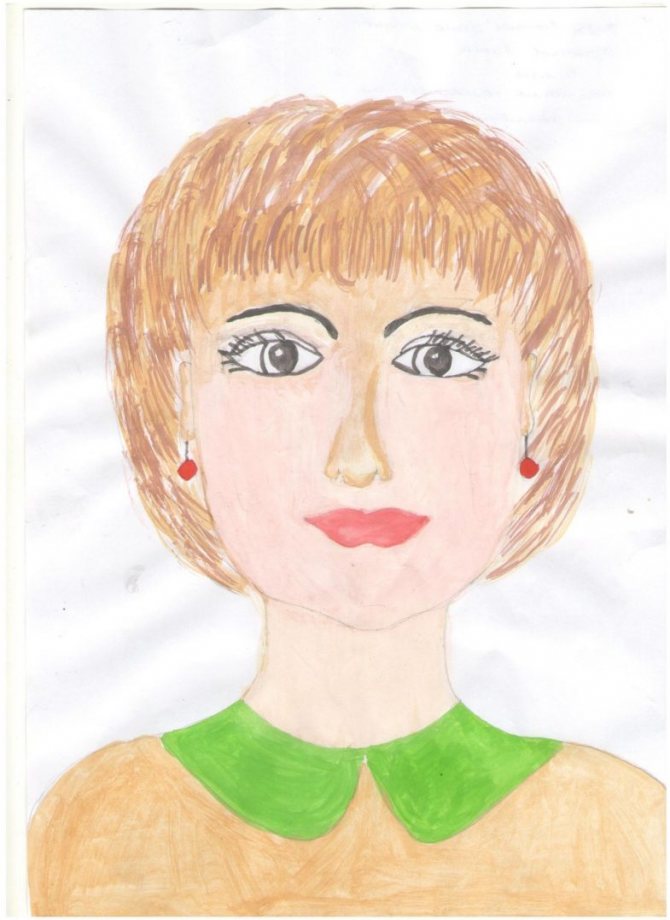
And at the end of the article I will attach pictures that my daughter drew for me. Just don’t laugh loudly - the child tried)
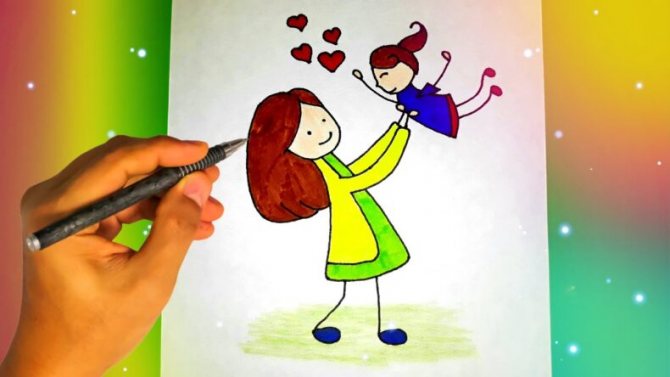
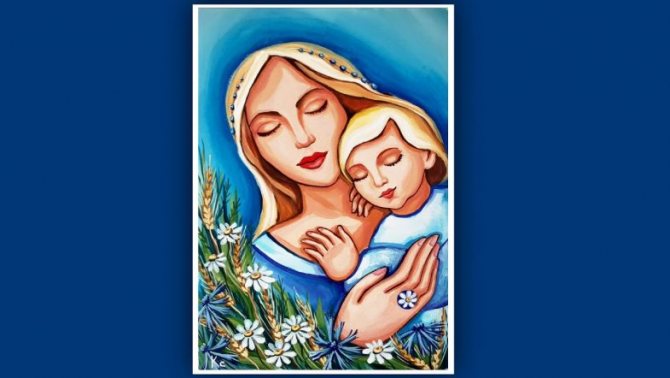
How to draw mom on March 8 or Mother's Day in watercolors
Let's start with the option that is often given in schools. For some reason these are just colorful variations. Some show children how to first draw a pencil sketch, while others draw directly with watercolors on paper.
Let's look at both methods.
The first option is closer to me. I prefer to first mark the elements with a pencil.
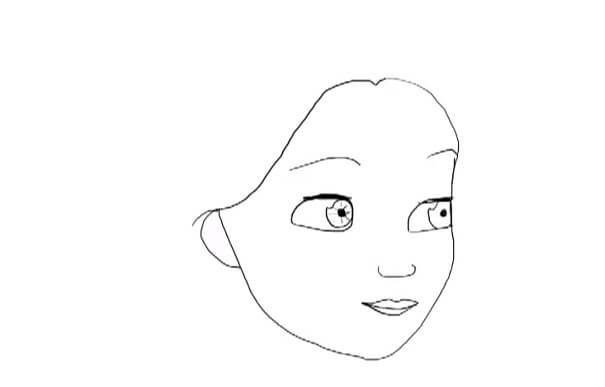
Let's start by drawing an oval. Preferably tapered at the bottom. There will be a chin there. For it you need to draw two parallel lines that will mark the neck and bring them to the shoulders. Draw as your hand goes, then you can wipe it all off with an eraser and correct it with paints.
Next, we look at the oval and try to schematically divide it into two parts with a line. From there we draw the eyes exactly in the middle. It will be clearer this way. Using the eye, divide the lower part of the face in half with a line. The nose ends there. And we outline the line of the lips.
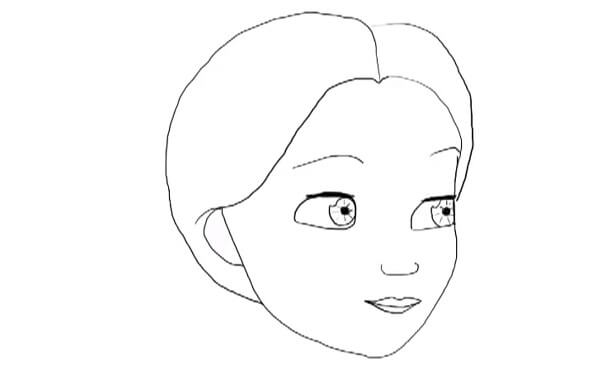
Now the drawing stage. We designate the ears. They go from the end of the eyebrow to the cheekbone. draw eyebrows and hair.
We take out paints or gouache.
Take a soft pink color. Or mix red with white. Skin type may be closer to beige. Then we dilute orange or brown colors with white. All of these shades are suitable for depicting skin color.
Fill the background.
Paint over the area of the hair. We have them of a non-uniform color. Therefore, you can take one color, but use two shades of it (darker and lighter).
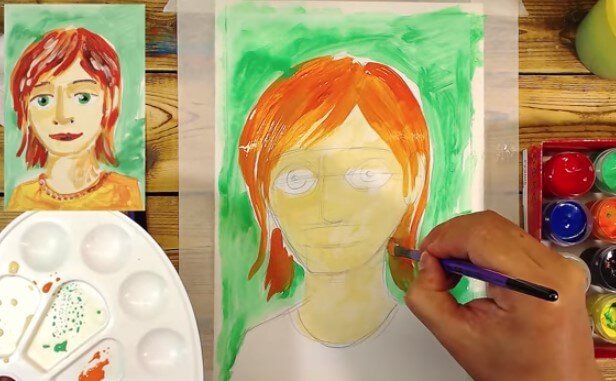
Take a shade slightly darker than the skin color and draw on the eyelids, nose and eyebrows. You can make a shadow on the neck.
In the eyes we highlight the pupil in black. We paint our lips.
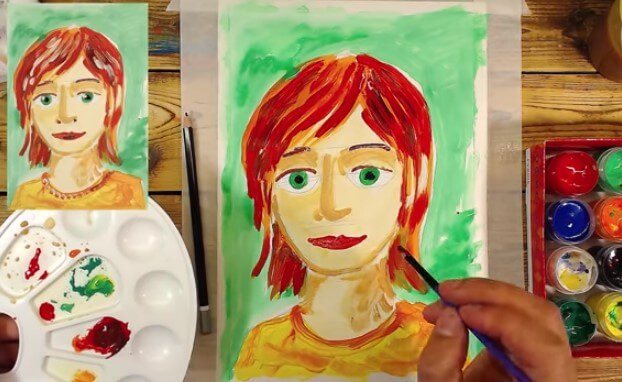
Now we take whitewash (white color) and apply highlights. We do them near the pupil and on the hair. You can also apply a drop on your lips.
All that remains is to paint over the clothes and sign the drawing.
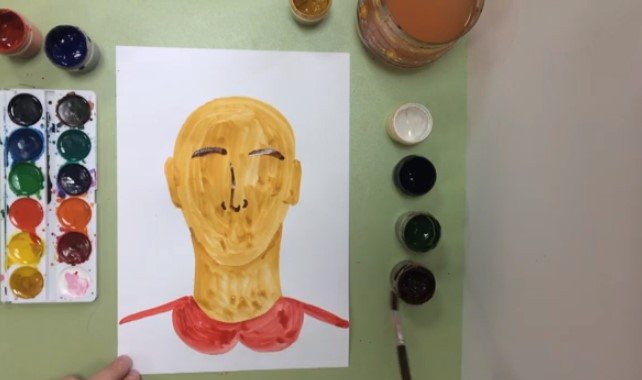
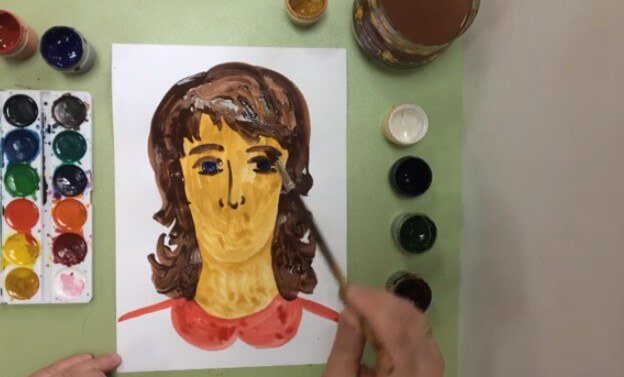
The second option does not involve a pencil. That's why I think it's more complicated.
Mix brown, beige or pink with white and draw an oval. It is shaped more like an egg. The narrowed part down.
We paint the neck and ears with the same shade.
Next we have clothes.
Take the brown color and draw the arches of the eyebrows and nose.
Often the eyebrow color matches the hair color. Therefore, we will paint the hair with the same brown shade. But there are brunette and blonde mothers. Then you need to paint your hair with this color.
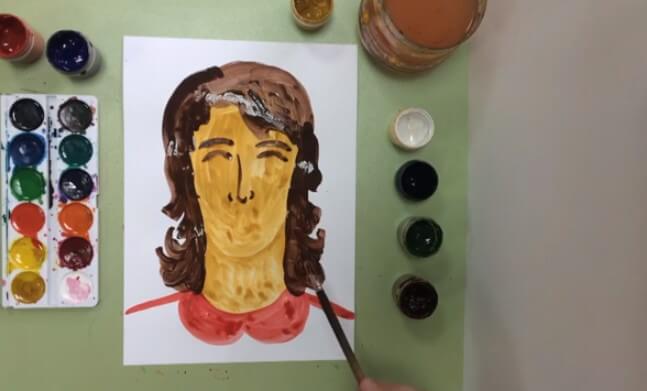
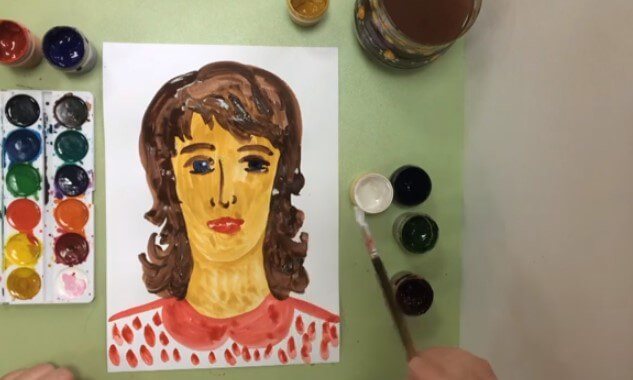
Eyes are the easiest to draw, like in this photo. First there is an arc, and in its center there is a circle.
We draw this circle from below with a line.
We draw lips and make highlights with white in the corners of the eyes, on the hair and on the lips. But to prevent the paint from spreading, you must first let the drawing dry!
This is roughly how it works out for us.
Here is another detailed diagram.
For me, it’s more convenient to start drawing portraits with pencils first.
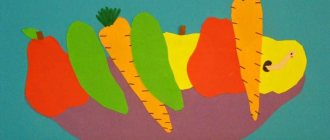
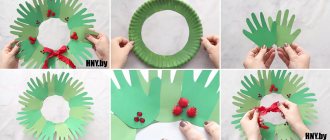
Volumetric paper applique
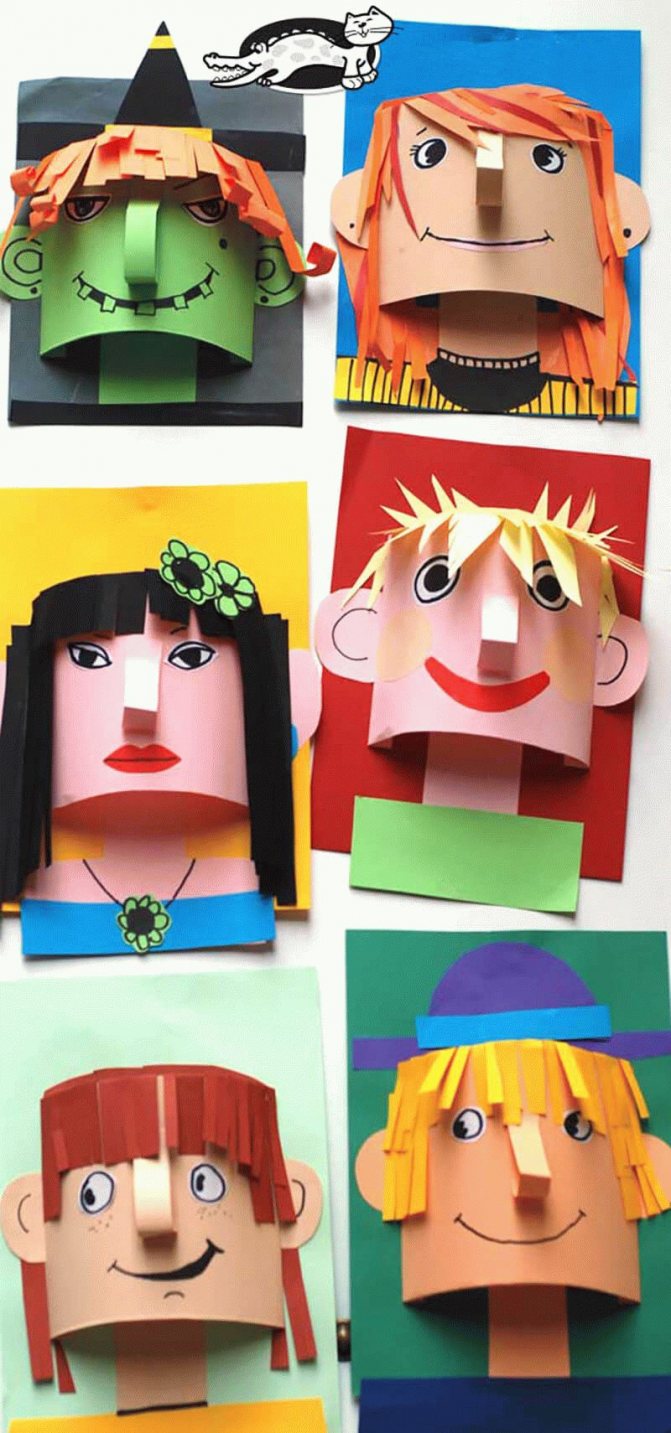
To create such funny portraits you will need: a set of colored paper, a sheet of thick cardboard, scissors, a glue stick and a black marker.
A sheet of cardboard will be the basis for a future craft.
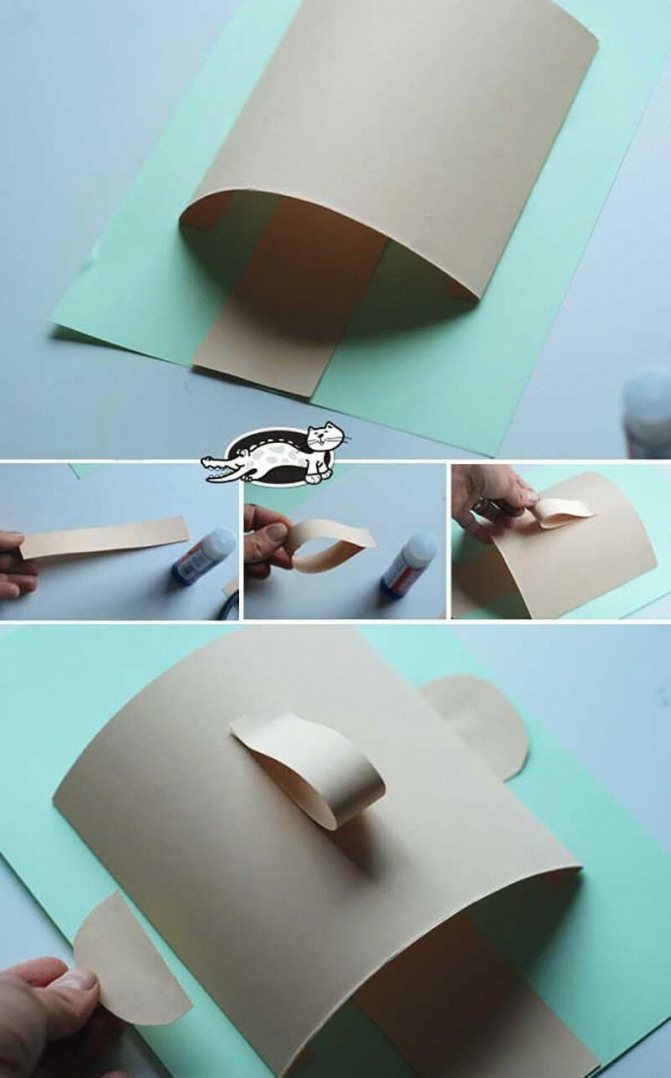
We cut out a rectangle from a beige sheet, bend the edges and glue it to a sheet of cardboard so that the sheet of paper sticks out. This will be the face.
Now we cut out a strip of beige colored paper and glue it vertically - this will be the neck.
Don't forget about the ears and nose - we also make these parts from beige colored paper.
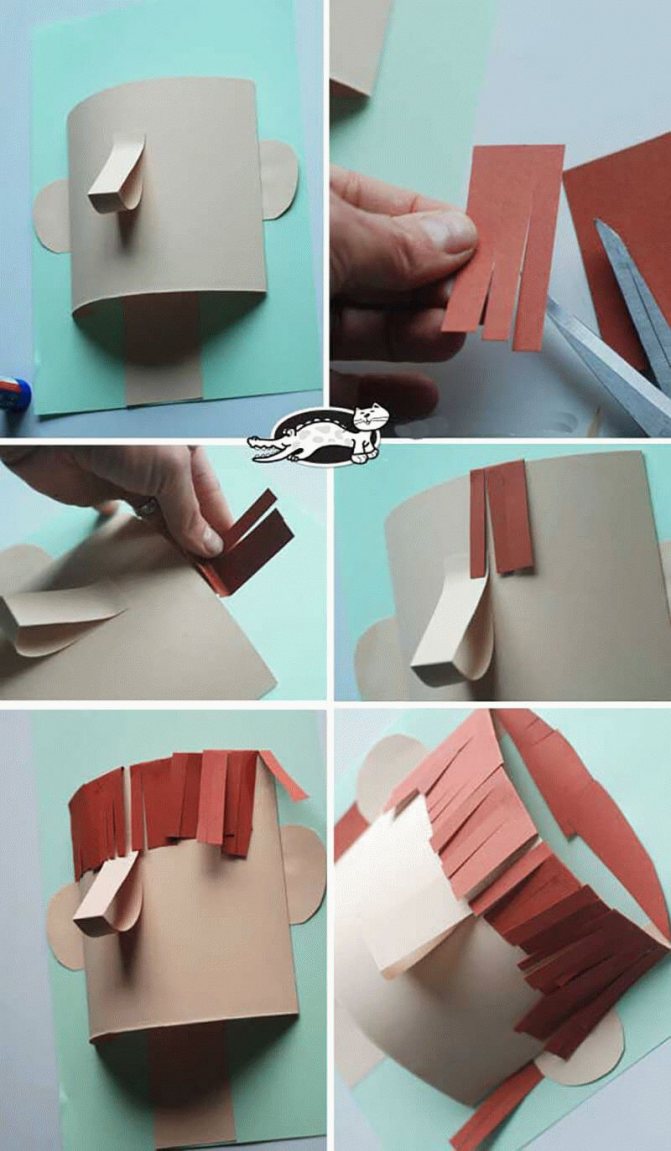
Well, now that the basis of the three-dimensional portrait is ready, you can begin to create a unique image.
Glue hair from colored paper, draw eyes with a marker, a smile, freckles, eyelashes and eyebrows.
You will definitely get unusual three-dimensional portraits that can be hung in a child’s room or presented as a gift to your beloved grandparents.
Drawing for children 7,8,9 years old
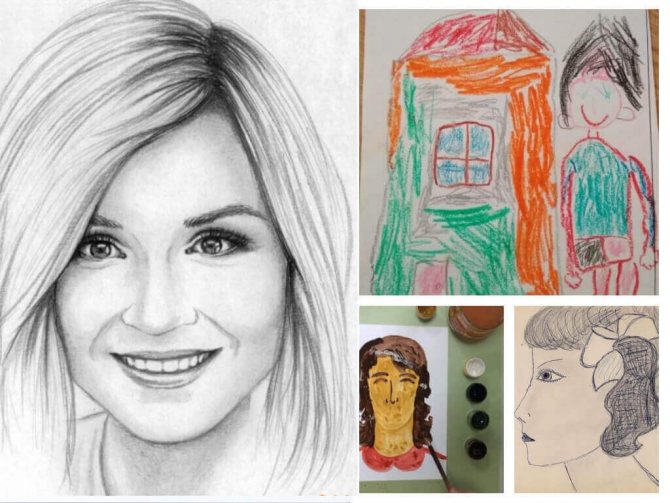
Now I’ll tell you how quickly you can look like your mother. To do this you need to take her photo. It’s better to take a portrait, where the face is open and clearly visible.
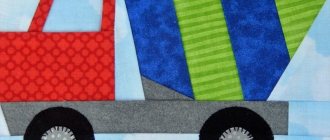
I'll show you a simple example using a regular drawing. We will transfer the drawing to paper in two simple ways. Using light, a window or a monitor screen. Nothing complicated, but for 8-year-old children, this may be just a godsend.
So, take a photo or the desired picture, a pencil and a blank sheet of paper. During daylight hours, we put mom’s image to the window.
Place a clean design on it and press it well with your hand. Let's see how clearly all the lines are visible.
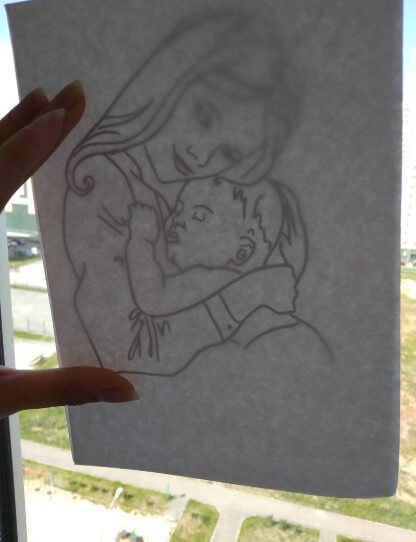
Pressing both sheets of paper against the glass, carefully draw lines with a pencil. We try not to move our hand, otherwise all the lines will move and we will have to start over.
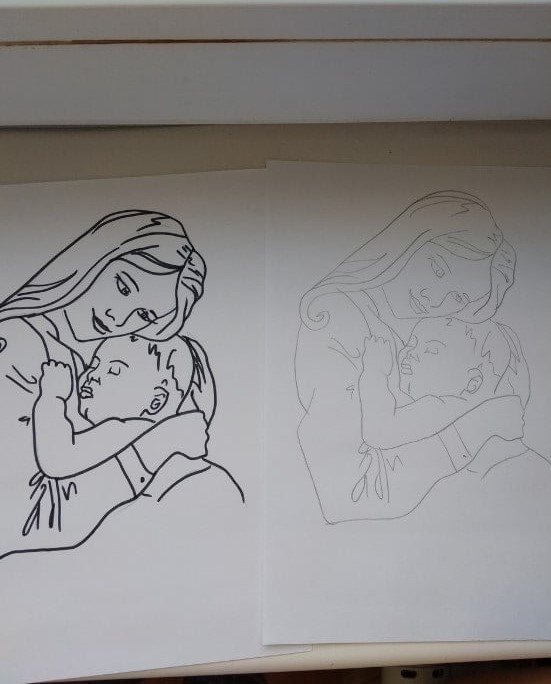
Here are two drawings. The one from which they drew and the one that turned out.
Screen drawing option.
But, attention! You can only draw from the monitor screen with a very soft pencil and movements without pressure!
Open the photo or drawing in full screen.
Attach a blank sheet. Lines are drawn.
Carefully and without pressure we transfer the lines onto the paper. It's better that they be uneven than cause damage to the screen. The lines can then be erased and redrawn. The main thing is to transfer the general sketch. This is what happened to me.

Somewhere, of course, the hand slipped. But this can be fixed. Then, if desired, you can apply shading or color the drawing with paints. The degree of similarity to the mother’s portrait will be higher than a regular drawing. Dad's image can be made the same way.
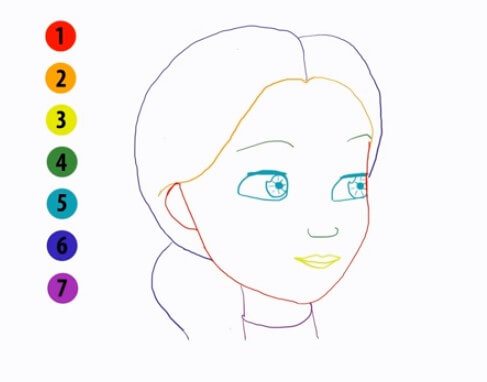
Now there are several schemes for constructing a woman’s face, which will be understandable to children.
Option one. First, draw an oval with a narrowing at the bottom. Conventionally, we divide it in half both vertically and horizontally. Cut off the hairline and hairstyle. Then we draw the eyebrows and eyes.
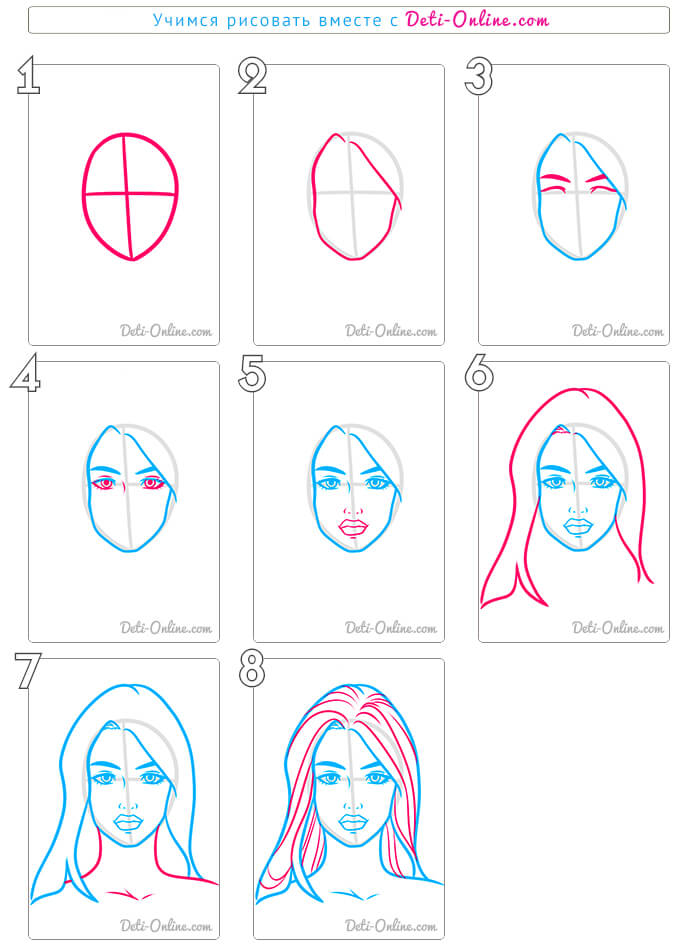
Then we will draw the nose and lips. Next we mark the neck, collarbones and hair.
The second option is simpler for children.
Another idea.
Using this diagram, children will understand how to draw eyes. How can you not draw an oval, but immediately designate a face? That there is a neck and ears.
Basic Tools
To draw, you will need simple tools: a simple pencil, an eraser, paper. You need to take care of a standard sheet of paper - A4 size.
The pencil is the most common tool for any drawing. It is suitable for both a simple and complex portrait. For a preparatory sketch, a very thin lead is preferable, and for a complex image, a wider, soft one.
Colored pencils or felt-tip pens are suitable for coloring. You can use paints, crayons, wax pencils, pastels and any other tools.
Sometimes several materials are combined, but in this case you need to have a good understanding of the features of working with them.
How to easily and beautifully draw a mother with a pencil
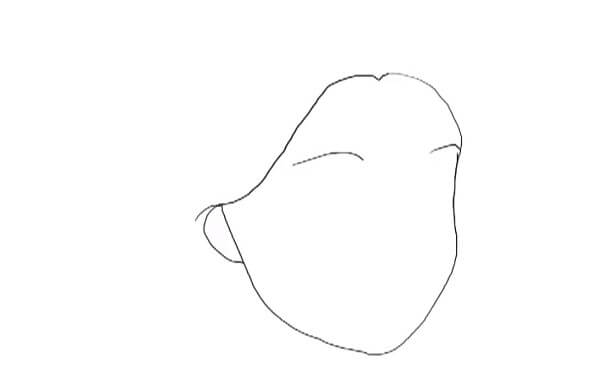
A simple option on how to simply draw a woman's face. For example, this. It looks like she’s a mom from a cartoon, but I can’t say for sure.
First we try to draw a line half a turn and define the chin. See that we are making a smooth rounding of the cheekbone and forehead. The chin is sharper.
Let's roughly note. where the hair starts.
Mark the eyebrows and ears.
Now we mark the nose and lips in the lower part of the face.
We draw the eye under the eyebrow. It looks like an elongated oval. Inside is a pupil ball and a circle.
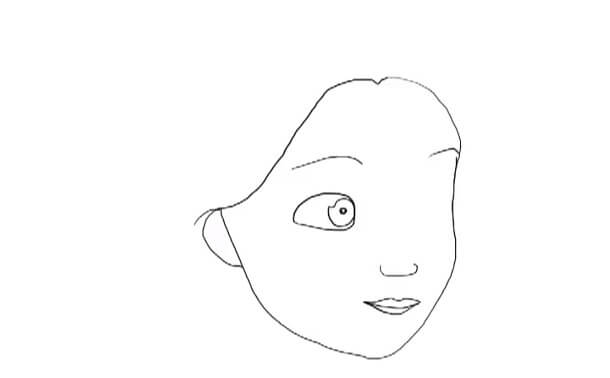
We repeat the same with the second eye. The lash line can be drawn several times to make the color brighter.
Next we add the hairstyle. We remember that our head is not flat, we are not afraid to give it volume with rounded lines.
There are many hairs on the head. You can show some of them.
Add a neck and color as desired.
The basics of painting a portrait in brief
- The face is an oval
- Eyes, eyebrows, ears - symmetrically
- If the oval is divided equally horizontally, we get the eye line.
- The top of the ears also starts here.
- Eyebrows symmetrically above the eyes
- The distance between the eyes is equal to the length of the eye.
- The tip of the nose is located exactly in the middle of the lower part. The sinuses are symmetrical.
- In the middle of the nose-chin distance, there is a smile line, lips below and above this line.
Children at different ages have drawing skills to completely different degrees. A 5-year-old boy who is inclined to draw will portray his mother better than the same second-grader who wields a ball, like Ronaldo.
However, there is both a simple drawing technique suitable for kids, and a ready-made algorithm for older lovers of drawing.
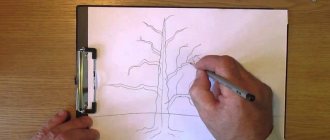
We draw a mother with a child in her arms according to the cells (grid)
My dad taught me how to draw on a grid. In seventh grade, I was very interested in drawing people and faces. But he was still very far from being a portrait painter. And the dissimilarity of Natalia Oreiro or Britney Spears from the calendar and my drawings was very upsetting.
Dad showed me how to maintain proportions using cells. It was just a must have! Unfortunately, there are no more of my drawings left, but there are always famous actors! worked out.
Now I sometimes use this method to scale drawings. For example, I drew bunnies as a child.
I think you will like this method too.
Let's take a picture. For clarity, I will repeat it on the same piece of paper.
We mark the entire picture with a grid. I took a scale of 1 to 1 cm. It turned out to be 7 cells horizontally and 9 vertically.
The more cells and the smaller the scale, the more detailed the drawing will be.
Below we draw the same number of cells. The scale can be increased.
For example, if your picture is small and you want to draw more. Then you draw the same number of cells, but take not 1*1 cm, but 2*2, for example. For convenience, I numbered them, like for a game of sea battle!
And we see that each line has its place. For example, the first row is the sixth cell - there the lower left corner is rounded with hair. We transfer a similar line to our cell. And so the whole drawing. As a result, you don't get lost in the whole composition. And draw the lines carefully. The result is a pencil sketch.
Then I erased the mesh with a soft eraser. Which does not tear the paper and does not leave behind dirty stains. And I drew shadows with shading. Then the drawing turned out to be more voluminous.
Advice! If you are drawing from a photograph, then you do not need to apply a grid to it, otherwise you will ruin the photo. Make cells on a piece of plastic bag and attach to the photo.
Complicating the task
If you want to complicate the task, you can draw a portrait the way artists do. They distinguish two options. The first is a formal portrait, where a person is depicted in a position according to his type of activity. In this case, this is the “work” of being a mother. Great emphasis is placed on composition and environment.
In the second case, the person is depicted performing everyday work in a familiar environment. The pose should be free and natural. This method of drawing appeared thanks to instant photography. But such painted pictures of mom require skill.
Hairstyle
We cover the hair taking into account the color, making light and color shades.
- Line your eyebrows, not too brightly.
- It is advisable to paint the iris in several stages, adding depth of color around the edges.
- Line your upper and lower lashes with a thin brush or black liner.
- Use white paint to highlight the pupil.
Stages of drawing a portrait with small children
The first stage is creating a sketch; it is necessary to teach even small children how to construct a drawing and proportions. Plus the pencil can be erased and drawn again.
Step by step, use a pencil to make a blank for the future portrait, and then you can color it with paints or felt-tip pens.
- Using a pencil, draw an egg in the middle of the sheet, it is important not to press too hard on the pencil so that you can correct the sketch.
- Approximately in the middle draw two arcs.
- Under the arcs, outline identical even circles - the irises of the eyes, finish the eyes with another arc under the irises and another circle-pupil.
- A little lower we roughly outline the nose, with a small arch, slightly darken the nostrils on both sides
- Smile line in the center and beautiful lips
- Don't forget to add ears, they end approximately where the lower lip is.
- Remember what kind of hair your mother has, curly or straight, long or short, with bangs or pinned up.
- The final stage will be drawing the neck and clothes.