Topic: Make whatever toy you want as a gift for a friend.
Yulia Zhdanova
Topic: Make whatever toy you want as a gift to a friend.
Program objectives: Continue to develop figurative ideas and aesthetic perception. Cultivate attention to other children , a desire to take care of them.
Reinforce previously learned modeling techniques. Progress of the lesson. At the beginning of the lesson, ask the children about toys toys they have , which ones they like to play with. And how happy everyone is when they are given toys . You can pay attention to the toys standing in the group .
Remind children that they need to think about the shape and color of your toy . We discuss with the children who wants to make what kind of toy .
Physical education minute. We're tired, we've been sitting too long. We wanted to warm up. We put aside all our business and started charging. Then they looked at the wall. Then they looked out the window. Right, left, turn, and then turn. Let's start squatting. Don't rush to squat. And we sat down for the last time. And now they sat down.
If necessary, help children choose the right modeling techniques. During the sculpting process, clarify the techniques and the name of the sculpting form.
At the end of the lesson, consider with the children what they have sculpted and talk about the sculpted images.
Summary of educational activities “New Year's gift” Purpose: Creating conditions for the cognitive and speech development of children through a gaming situation. Objectives: Correctional - educational:.
“Cut out and paste whatever toy you want” (In the world of fairy tales and cartoons) Summary of an open lesson on appliqué on the topic: “Cut out and paste whatever toy you want” (In the world of fairy tales and cartoons) in the middle group. Didactic game “Make Tin the Snowman” Author’s didactic game for senior preschool age “Make Tin”, presented by teacher O. N. Skvortsova, MBDOU No. 21, Novopokrovsky village.
What kind of music should my child listen to? What kind of music should a child listen to? Today, parents pay less and less attention to what kind of music their child listens to when remembering.
Abstract of a collective creative activity using ICT “Gift to a friend” for children of the older group (5–6 years old) Integration of educational areas: • “Cognitive development”, • “Artistic and aesthetic development”, • “Social and communicative.
GCD summary for junior group 2. Artistic creativity (drawing). Topic: "Let's smile at each other." GCD summary for junior group 2. Artistic creativity (drawing) “We will smile at each other.” Goal: Expanding children's active vocabulary.
Summary of GCD in the preparatory group “If you want to be healthy. A visit to an otolaryngologist" Summary of educational activities in preparatory group No. 1. Topic: If you want to be healthy (visit an otolaryngologist). Goal: clarify and expand ideas.
OOD abstract for application Topic: Creating a collage “Gift for Moms” MUNICIPAL AUTONOMOUS PRE-SCHOOL EDUCATIONAL INSTITUTION BOLSHEALEKSEEVSKY COMBINED KINDERGARTEN “KALINKA” STUPINSKY.
Summary of the circle lesson “Give each other kindness” for children of senior preschool age Topic: “Wonderful old man” Summary script of the circle lesson Direction: cognitive. Age of pupils: Children of the preparatory school group 6-7 years old, in number.
GCD in the middle group “Gift for a friend” SYNOPSIS of GCD in the middle group on the topic “Gift for a friend”. Educational field “Artistic and aesthetic development” (non-traditional techniques.
Source
Plasticine parrot
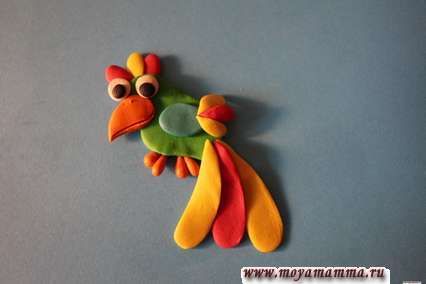
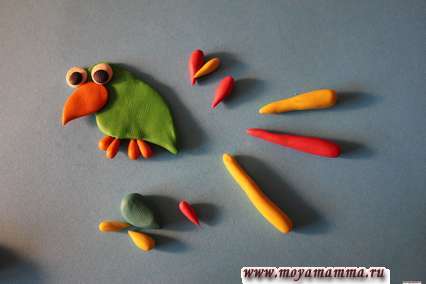
Multi-colored parrot made of plasticine in stages for children.
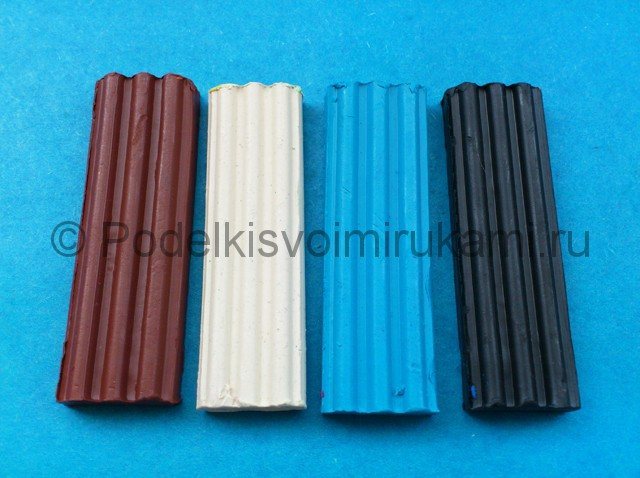
You will need modeling compound in green, emerald, red, yellow, white, black and orange.
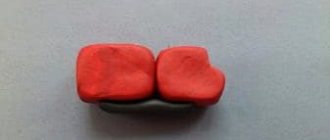
1. Roll a large ball from green plasticine, and four small ones from orange.
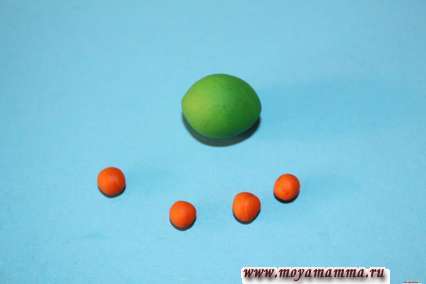
2. Give the resulting balls a drop shape.

3. Form a flat body from the green drop. Connect the orange droplets in pairs.
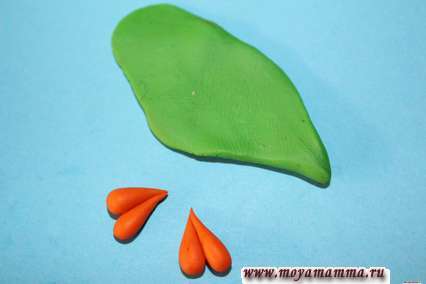
4. Stick the resulting legs to the parrot’s body.

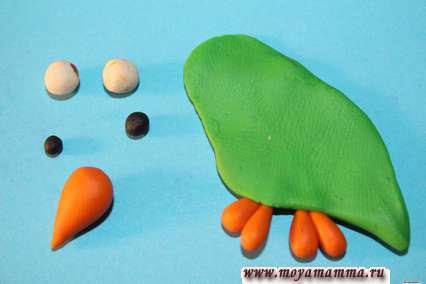
5. Make a beak from orange plasticine and a white and black eye as shown in the photo.
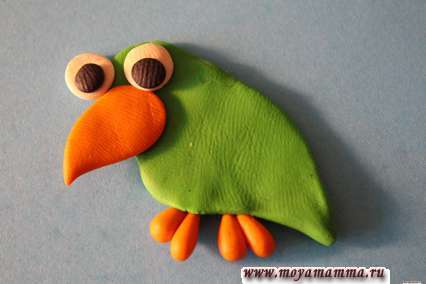
6. Glue the beak and eyes to the parrot's head.
7. Prepare some emerald plasticine for the wing. For the crest, tail and wing, make three teardrop-shaped sausages of different colors.
8. Attach a tuft, tail and wing to the parrot.
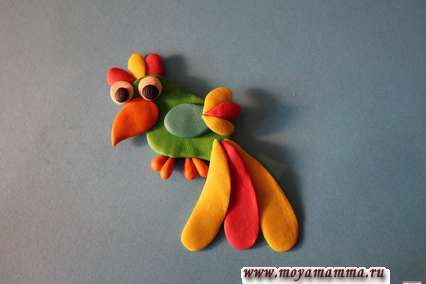
9. Using a toothpick or a needle, draw the mouth and nostrils. The plasticine parrot is ready!
Source
Summary of GCD for modeling “Our Favorite Toys” in the middle group
Purpose of the lesson: to teach children to work with plasticine; sculpt various
objects, conveying their shapes, proportions, poses.
Teach children to sculpt familiar objects - toys , convey their characteristic features, consolidate knowledge about the properties of plasticine;
develop skills in organizing the workplace;
develop cognitive interest in creativity, imagination;
friendly attitude towards each other;
develop fine motor skills;
Cultivate accuracy and attentiveness;
Instill love for the world around us.
Preliminary work: reading poems about toys , riddles about toys , drawing toys .
Equipment and materials: pyramid toy , plasticine, plasticine board.
Application “Human Eye” (with template)
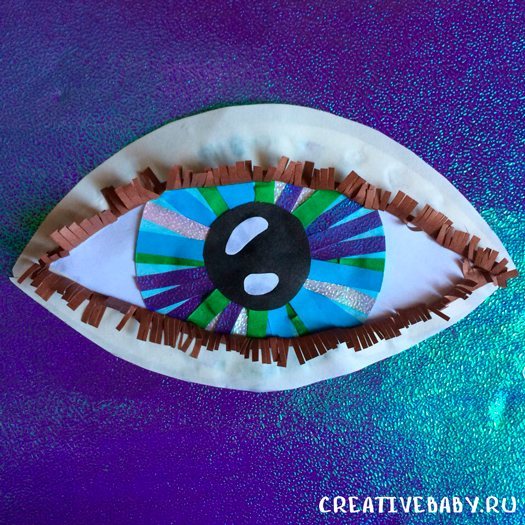
They say that the eyes are the mirror of the soul! Today we will try to make an unusual, but very beautiful craft, thanks to which you can find out what the eye is made of!
We made a blue eye, but you can make it any color! To do this, use appropriate paper colors.
When creating this applique, children will practice cutting even strips, combining colors and making fringes. Very useful skills for children's hands!
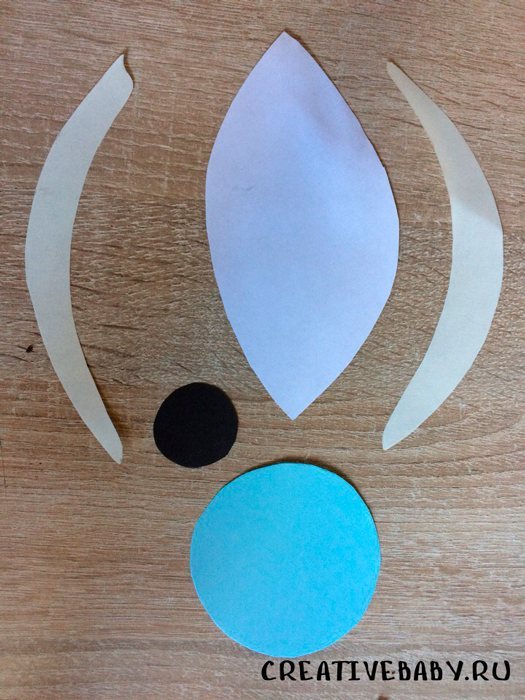
How to do:
1. For the craft, we made a ready-made template for printing. It can be a guide for you, or you can use it to make an entire craft if you don't have colored paper.
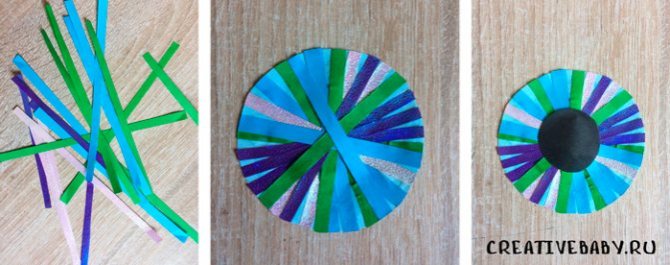
2. Cut out the pieces from colored paper.
3. Cut colored strips of the same width for the iris. Glue the strips onto the circle, crossing them in the center. Trim off any excess along the edges. Glue the black pupil in the middle and make a white highlight inside using a pen, clay or white paper.
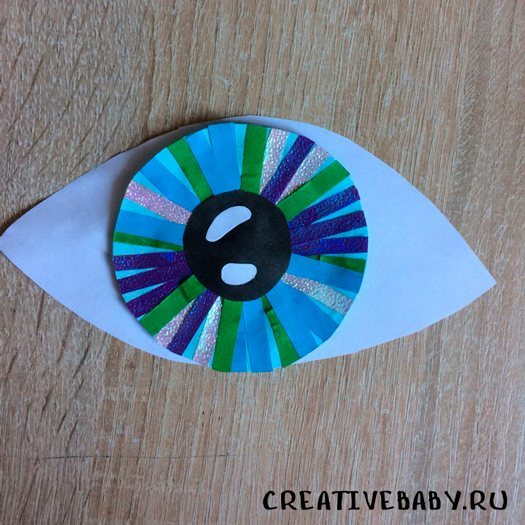
4. Connect the remaining parts of the eye together, glue the eyelids.
5. For eyelashes we will need long strips of brown (or black) paper. Make a fringe from one edge and twist it a little with scissors. Fold the other edge so that it can be conveniently glued to the eye.
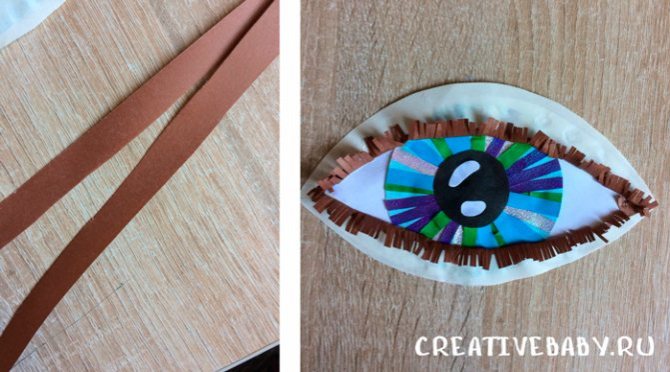
6. Now all that remains is to make the background for the applique. We will need 2 squares of blue and white. We glue all this to the background and we get an interesting composition!
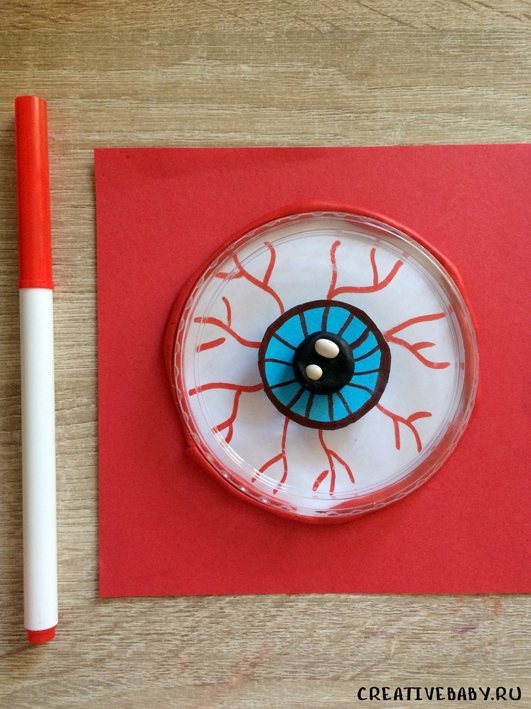
We made "Evil Eye" for Halloween. The master class is very simple: the veins can be drawn with a felt-tip pen or laid with red plasticine.
For this craft you will need a sour cream lid and plasticine.
Check out our other crafts:
- Find out what the Zentangle technique is. We will draw a butterfly using a template.
- An interesting toy made of cardboard and paper - a house with windows. Who will live inside?
- What a beautiful mermaid she turned out with a mosaic tail. We will decorate it with plasticine balls. Hard work to develop manual dexterity!
- Make the famous character from Julia Donaldson's children's book, The Gruffalo, using plasticine.
- Watch how to make a monster from colored paper and cotton pads.
- The application “Penguin with a loving heart” made of colored paper and plasticine will be an excellent gift for loved ones!
DIY sock monkey toy
· 1 pair of socks (striped socks are easier to cut)
Eyelets or buttons
· Stuffing material
Cotton pad or filter padding
Cut out eyes from felt.
Turn the sock inside out and smooth it with a warm iron
Draw the pattern on the sock using a dry erase marker or fabric chalk.
We secure the parts with pins. We sew the parts together on a sewing machine.
There will be a hole between the monkey's legs through which the sock can be turned inside out.
We turn out the legs, torso, arms, ears, with the exception of the tail.
We fill the parts with stuffing material.
We sew up the hole between the legs with a hidden seam. To hide the thread, thread it side by side and pull it out on the other side, cutting off the excess.
Fill the arms with stuffing material and sew the raw edges together, gathering them so that they are on the inside.
We stuff the ears with filler and sew the raw edges together with a blind stitch. Fold each ear vertically.
Cut a piece of cotton lining that will be three times the width of the tail and the length of the tail when stretched.
Fold the lining three times and sew the end to the end of the tail (from the wrong side).
Popular articles How a lie detector works. is it true that it doesn't work?
We turn the tail inside out, pushing the lining inside.
All that remains is to sew all the details.
How to make a figurine with a cone?
As the body-base, you can use not the plasticine itself, but a spruce or cedar cone. It needs to be painted red or blue using gouache. When the paint is completely dry, you can move on to working with plasticine.
To do this you will need plasticine of different colors: blue, red and green. As well as for the eyes and the design of the muzzle, you need to prepare small pieces of white and brown material. The step-by-step sculpting process is as follows:
You need to make stable legs from black plasticine and attach them to the bottom of the pine cone.
To learn how to make a parrot from plasticine, watch the video.
Source
DIY felt monkey
This felt monkey can be a good craft and gift as a keychain, interior decoration or car decoration.
We cut out the felt parts according to the template.
We glue the white felt pieces to the ears using glue. We sew the parts of the arms, legs and tail with a buttonhole stitch. We put the filling inside.
We attach the parts of the arms, legs and tail to the body, and sew them to the back of the body.
We attach the white felt piece to the muzzle piece and glue it with glue, and then sew it with a buttonhole stitch.
We sew on a beaded nose and also embroider a mouth. Using blush we create cheeks.
We sew the two parts of the head together with a buttonhole stitch, first inserting the ears and a loop so that the toy can be hung. Do not sew up the area at the bottom, filling the head with stuffing.
Then we sew on the beaded eyes.
We put filler into the body and sew the head to the body.
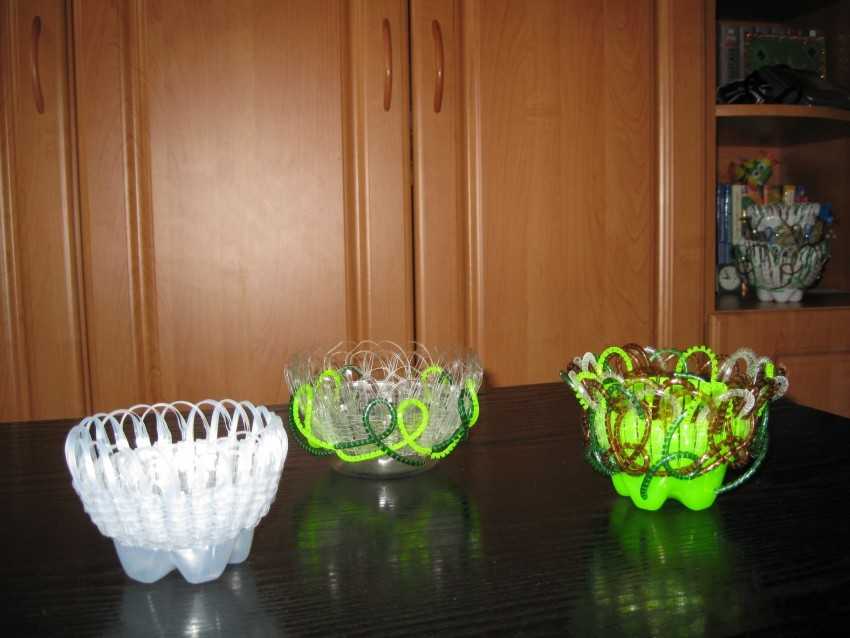
Christmas gifts
Christmas wreaths are made from plastic bottles, spruce branches with cones. This material is used for bells and Christmas tree decorations.
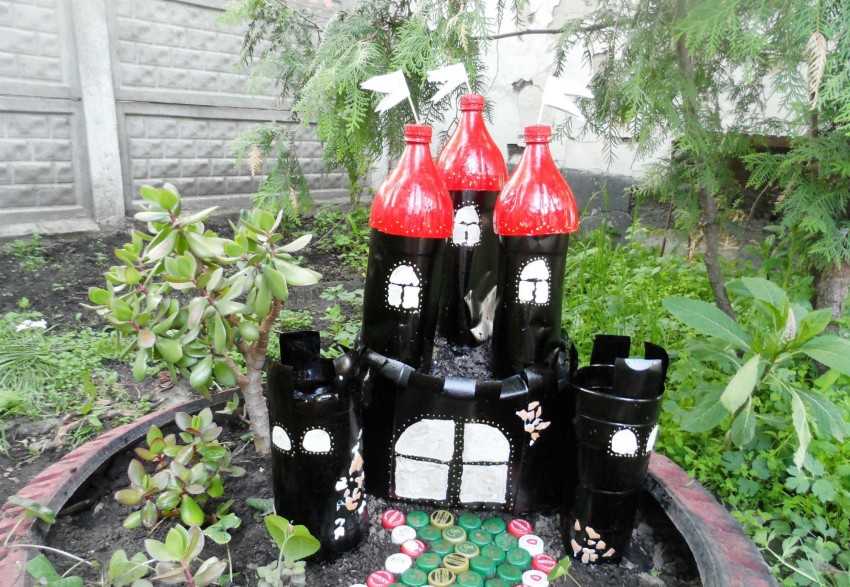
Funny Santa Claus will be an excellent New Year's craft made from plastic. To do this, you will need to cover the bottom of the bottle with a red compound.
Instead of a belt, colored adhesive tape is attached to the figure. Hair and beard are made from cotton wool. Santa Claus should have a red hat or cap on his head.
All that remains is to glue the eyes or draw them yourself. The nose will be a pink ball. You should add some blush to your cheeks, because the character spent a long time visiting in the cold.
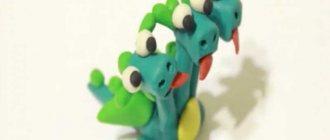
Husky
You will need: plasticine of gray, white, black, blue, red and yellow, toothpick, stacks.
Master Class
- Roll a ball of gray plasticine.
- Stack 2 triangles at the top of the ball.
- Attach 2 flat triangles of white plasticine.
- Cover the bottom of the ball with white plasticine.
- Roll out an oblong oval from white plasticine and attach it as a muzzle.
- Roll the nose out of black plasticine and attach it to the muzzle.
- Make eyes from blue, black and white plasticine and attach them to white triangles.
- Make a tongue out of red plasticine and secure it.
- Make the lower part of the mouth from white plasticine and attach it under the tongue.
- Make 2 triangles from gray plasticine and attach them as ears.
- Work out the features of the muzzle with a stack.
- Make a body out of gray plasticine, insert a toothpick and secure the head.
- Cover the dog's belly with white plasticine.
- Roll 2 sausages from gray plasticine and attach them as front legs.
- Make 4 white plasticine cakes and attach them to the paws as shown in the image.
- Roll a sausage out of gray plasticine and mold a crescent-shaped tail.
- Stack the ponytail, adding fluffiness, then attach it.
- Make a collar from blue plasticine, and make a clasp from yellow plasticine, then make holes with a toothpick.
- Draw the ears, muzzle and paws with a stack.
Plasticine husky is ready!
How to make eyes from plasticine.
In the process of creating all kinds of crafts from plasticine: people, animals and fairy-tale characters, you have to use your eyes. They are not at all difficult to mold from plasticine. In this lesson we will not only show you how to carry out this process in a few basic steps, but we will also try to reproduce the mood written on the face.
For easy work you will need little: a little white, black, blue and brown plasticine, as well as a cheerful mood. The amount of plasticine directly depends on the size of the desired craft to which you plan to attach the eyes. Our website also has a master class that tells you how to make homemade plasticine.
1. Select suitable plasticine blocks from the set. Of course, if you need to make scary eyes for some monster, then red material is quite suitable, but it is better not to scare the smallest sculptors.
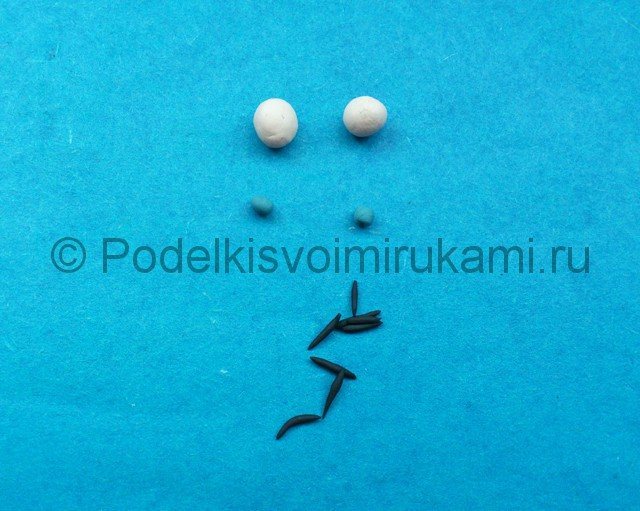
2. Roll small balls of white plasticine, and also prepare small grains of black and white.
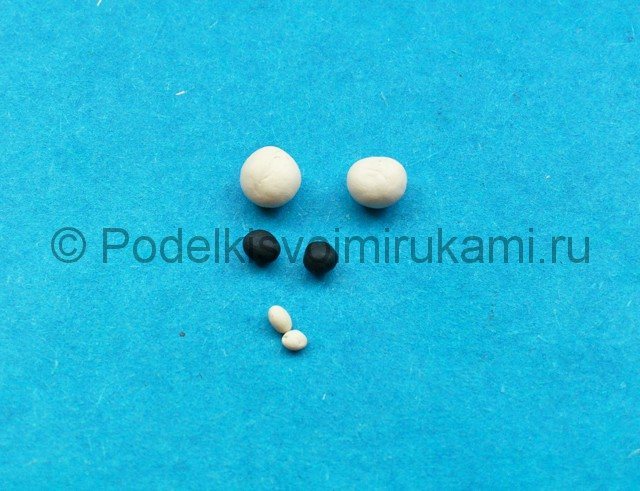
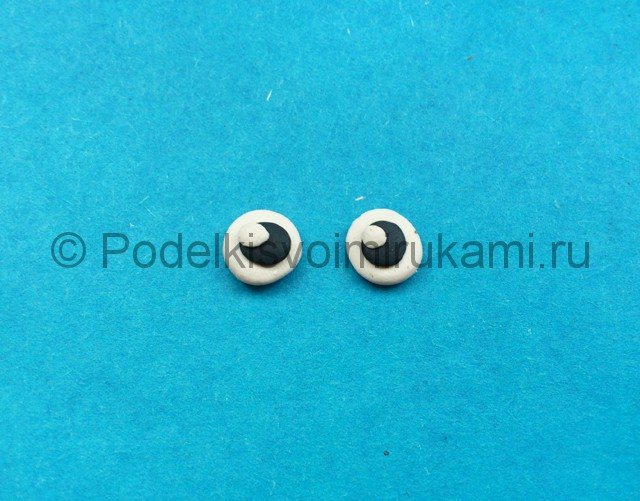
3. Flatten the larger white balls to make flat rounds and place the flattened black and white pieces on top. These are standard plasticine eyes.
4. Let's now create evil eyes from plasticine, which may be needed to sculpt some stern character. For this you will also need white, black and brown grains.
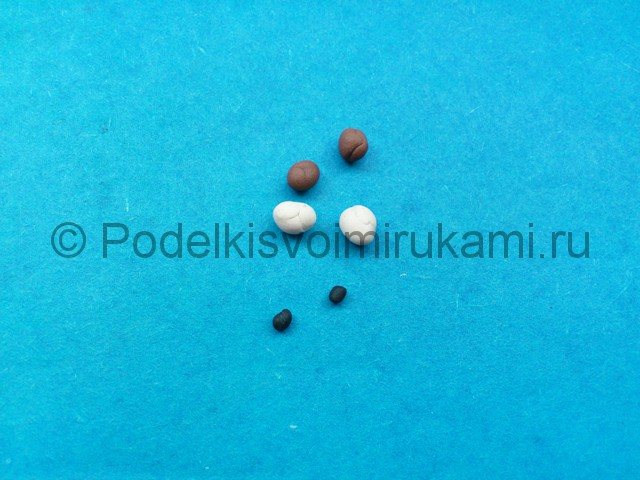
5. Make the eyes themselves not round, but narrower, add slitted pupils, and stick furrowed eyebrows on top. Evil eyes made of plasticine are ready.
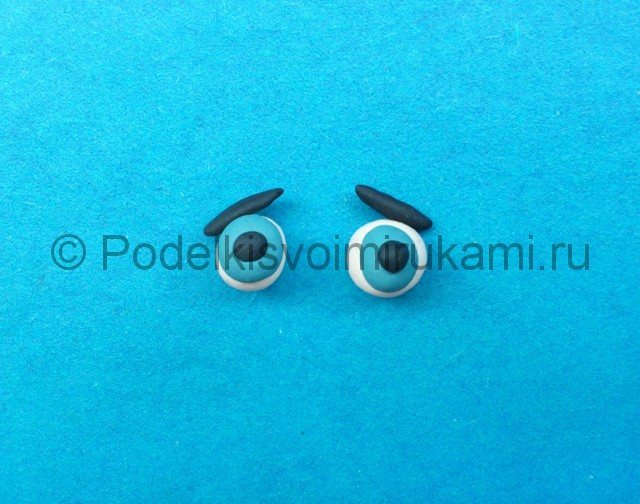
6. Another variation is surprised eyes. Stock up on white, black and blue grains.
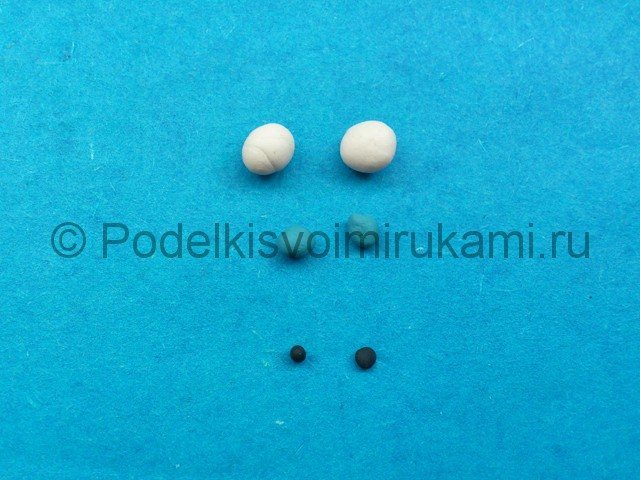
7. Collect your eyes, but don't forget about raised eyebrows, which will give a surprised expression on your face.
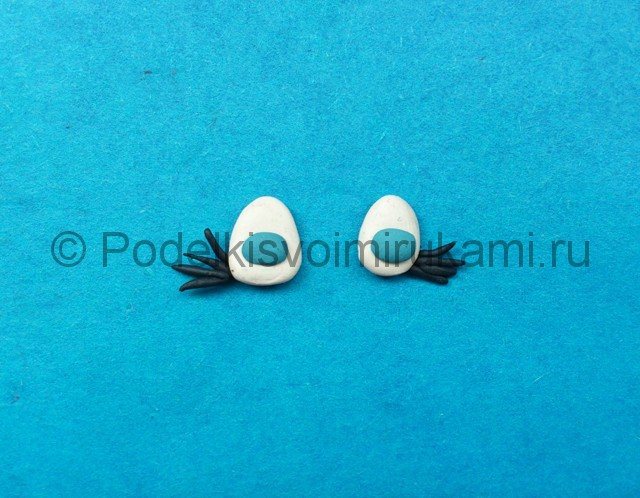
8. Kind eyes can also be made from similar initial details, but you will also need miniature eyelashes.
9. Setting the shape of kind eyes, make slightly oblong triangular cakes. Stick on blue pupils and attach tufts of eyelashes to the corners.
Taking into account our tips, it will not be difficult for you to sculpt the face of a person with eyes that match the shape in order to set the right color for the craft. By using your imagination, you can create romantic, sad or tired eyes
Source
Plasticine parrot

Multi-colored parrot made of plasticine in stages for children.
You will need modeling compound in green, emerald, red, yellow, white, black and orange.
1. Roll a large ball from green plasticine, and four small ones from orange.

2. Give the resulting balls a drop shape.
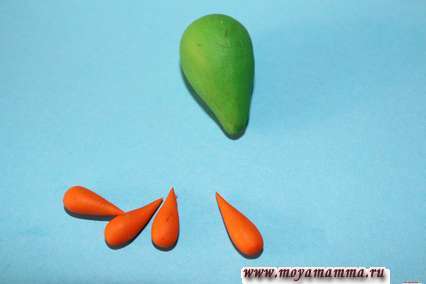
3. Form a flat body from the green drop. Connect the orange droplets in pairs.

4. Stick the resulting legs to the parrot’s body.
5. Make a beak from orange plasticine and a white and black eye as shown in the photo.

6. Glue the beak and eyes to the parrot's head.

7. Prepare some emerald plasticine for the wing. For the crest, tail and wing, make three teardrop-shaped sausages of different colors.
Step-by-step photo lesson:
The main color of plasticine that we need for sculpting a cockatoo is white. Do not feel sorry for him if you want to make this particular breed of parrot. All parts of the bird's body will be made from it. Look at a photo of a cockatoo on the Internet. This white bird has an interesting crest - it can be white, yellow or pink. So perhaps, in addition to white, you will also need a little yellow.
Roll two white balls.
Connect the balls and deform them, smoothly connecting the parts. You should get the body and head of a bird. It is also possible to sculpt a single part, i.e. You can initially take a larger ball and make a blank of the desired shape from it.
Attach two black dots - these will be the eyes. Also make a beak curved towards the bottom.
Create oblong feathers for the tuft, for example, pinch off pieces from yellow plasticine, then roll each into a ball and pull it into a thin sausage.
Place thin sausages on the top of your head in the form of a tuft. It is advisable to start with the shortest part and end with the longest.
Add wings and a tail to the body. To make them you will also need white plasticine, so do not forget to leave it. The tail should be straight and thin. Stack to make the pieces striped.
Attach the paws. They can also be made from yellow plasticine, which we previously needed for the tuft.
So the beautiful snow-white cockatoo parrot made from plasticine is ready. The bird can sit on a perch and chirp. We hope you and your child liked this lesson, and it will not be the only one in the educational complex.
Plasticine allows you to plunge into the world of childhood. The incredible forms that can be obtained from it are fascinating, and positive emotions can have a beneficial effect on the psyche. If this material has such an effect on adults, then in relation to children it is greatly enhanced.
If parents don’t know how to calm a restless child, they just need to buy him some plasticine; if they are trying to interest their child in something, then plasticine will again come to the fore.
You can come up with a huge variety of options for crafts. This is made from plasticine, and crab, and. If you only have white plasticine left in your kit, you can find a use for it and make a cockatoo parrot. Several distinctive features will allow you to reproduce this bird.
Modeling of Kesha the parrot
Since the hero of the famous cartoon, a parrot named Kesha, is a very popular character among children, you can mold him from plasticine. To do this, you only need plasticine of different colors: pink (dark and light), yellow, red, green, blue.
The body should be sculpted from dark pink, and the head from light pink. Next, you need to stick two white cakes on the muzzle, and make the beak and eyes from yellow plasticine (in this case they should be large).
To make wings, you need to roll two green ovals and attach a small blue ball to them. Flatten the resulting shapes and make cuts from the blue edges using scissors.
Now you need to attach a short tail from the green color behind the body. And then roll a sausage from the same plasticine and make it flat. It also requires making small cuts and gluing it on the head - this is a mohawk.
The paws need to be formed from yellow plasticine. In this case, there is no need to decorate with a toothpick.