Abstract of the GCD for modeling “Harvest in the garden” in the senior group
Victoria Vasilyeva Summary of the educational method for modeling “Harvest in the garden” in the senior group
Goal: to be able to convey the characteristic features of each vegetable in sculpting.
— Learn to create scenes with homogeneous objects, placing several figures on one stand;
— Learn to compare the shape of vegetables and fruits with geometric shapes;
— Enrich children’s speech with adjectives that characterize properties and qualities.
— To form the logical thinking of a preschooler through solving a problem situation;
— Develop the ability to sculpt familiar objects (vegetables) from life and from imagination, to depict their characteristic features.
— Cultivate the desire to complete the work started;
— Cultivate accuracy in work;
— Develop creativity, imagination, encourage creative discoveries and children’s desire to independently decide on an image;
— Cultivate interest in Russian folklore and riddles.
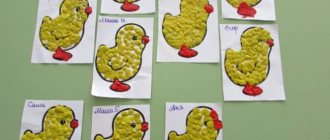
Preliminary work: examining subject pictures from the “Vegetables” series, coloring coloring books with vegetables, the didactic game “Wonderful Bag”, learning finger exercises.
Equipment: Envelope with a letter, plasticine, stacks, modeling boards, models of vegetables, teaching material on the topic “vegetables”.
(Knock on the door). The teacher brings an envelope with a letter.
- Look, they brought a letter from the forest from the Hare’s mother. They got into trouble. An evil Crow flew to their beds and took the entire harvest with it. Now Mama Hare will be left with her bunnies without tasty and healthy vegetables.
— They sent us a sad letter. Guys, do you think we can help the Hare?
(listen to the children's answers)
Educator: Guys, today I suggest you make a garden with a harvest for the bunnies. Let's take a closer look at vegetables. Children look at dummies and images of vegetables, the “Vegetable Garden” poster, specifying the features of their appearance (structure and coloring, shape of leaves, how vegetables grow in the garden bed)
Before we get to work, let's warm up a little.
One, two, three, four, (Walking in place)
Children learned vegetables: (Jumping in place)
Onion, radish, zucchini, (Tilts left and right)
Horseradish, carrots, garlic (Hand clapping)
Children are invited to the tables. There is plasticine and boards on the tables, the teacher explains the sequence of work.
Explanation and demonstration of the sequence and techniques of sculpting:
We make a ball from red plasticine. We make a flat cake from dark green plasticine. Cut out a star from the flatbread. We connect the details. We bend the leaves slightly upward. We sculpt a twig from dark green plasticine.
We make a ball from purple plasticine. Then we pull it out a little to make a droplet. We make a star from dark green plasticine, as for a tomato. Only fold the eggplant leaves down. Let's make a small branch.
To sculpt cabbage, prepare and knead green plasticine in your hands. Divide the prepared piece into small slices for sculpting cabbage leaves. Mash each slice in your hands, then press it on top with your fingers and stretch it to form thin oval-shaped cakes. Leave one part in the form of a ball. Make a ball with the center of the fruit, and stick leaves around it in the shape of a green rose.
To sculpt carrots you need green and orange plasticine. The fruits of this vegetable are oblong cone-shaped pieces that have pimples. To show them, use the stack again and pierce the soft plasticine in a random order. Make oblong leaves from green plasticine. Attach the leaves to the fruits.
We chop and chop the cabbage (swinging movements with our hands, like an ax
We knead the cabbage, knead the cabbage, (“knead the cabbage”)
We salt and salt the cabbage (“take” a pinch of salt and “salt”)
We press and press cabbage. (flexion and extension of the hands)
The teacher instructs each child to sculpt their own beds so that the garden is “rich.” The children choose a material and begin to sculpt while listening to calm music. As I work, I help children who have difficulty choosing sculpting methods.
Source
Progress of the lesson
There's a knock on the door. They bring a parcel and a letter.
The teacher addresses the children:
- Guys, what do you think this is?
Children try to guess
Educator: - Let’s read the letter first, and then open the parcel, don’t you agree?
Teacher (reads)
: - the Fairy writes to us, she says that Winter and the Snow Queen ordered their subjects not to let Spring come to us.
But you can help Spring and plant a vegetable garden in the window, then the Sun will definitely help Spring, but the trouble is Fairy, the friend of Spring, has forgotten what is a fruit and what is a vegetable .
She asks you guys to help her! Can you help? -Let's see what we have here.
Educator: That's right. Guys, let us sculpt vegetables and fruits , and choose what exactly you will sculpt. (optional)
.
And then we the fruits on a plate and the vegetables on a tray and send them to the Fairies. Do you agree?
-Let's remember how we sculpt round and oblong objects (I show in the air)
. We must take a whole piece of plasticine and begin to roll it in a circular motion. We are the ones who sculpt round objects. Show us how we'll ride.
-And now we will sculpt oblong objects. We also take a whole piece of plasticine and begin to roll it between our palms. That's right, well done
Physical school
.
-Okay, guys, now let’s sit down at the tables, warm up our hands before work. Do not forget that you need to sculpt from a whole piece of plasticine, without breaking it into pieces.
(During individual work, he helps children by example)
.
Afterwards we put our work on a plate fruits , and vegetables on a tray .
- Guys, what did we sculpt today?
(Praise everyone and ask who sculpted what and why)
.
Now I will collect a package for the Fairies.
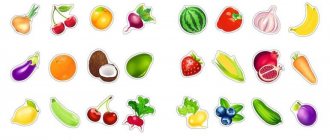
Summary of a lesson on application in the middle group “Vegetables and fruits” Lesson in the middle group. Application “Vegetables and fruits” (collaboration technology). Goals: *teach children to cut vegetables and fruits according to given instructions.
FEMP in the middle group. Lesson summary “Vegetables and fruits” Directly organized activity in an average mixed-age group. Formation of elementary mathematical concepts “Vegetables.
Summary of direct educational activities in sculpting for senior preschool age “Fruits and vegetables” Goal: Learn to sculpt vegetables and fruits Objectives: Educational: 1. Strengthen the ability to convey the shape of vegetables and fruits using a variety.
Abstract of the GCD for modeling “Harvest in the garden” in the senior group
Victoria Vasilyeva
Abstract of the GCD for modeling “Harvest in the garden” in the senior group
Goal: to be able to convey the characteristic features of each vegetable in sculpting.
Tasks:
— Learn to create scenes with homogeneous objects, placing several figures on one stand;
— Learn to compare the shape of vegetables and fruits with geometric shapes;
— Enrich children’s speech with adjectives that characterize properties and qualities.
— To form the logical thinking of a preschooler through solving a problem situation;
— Develop the ability to sculpt familiar objects (vegetables) from life and from imagination, to depict their characteristic features.
— Cultivate the desire to complete the work started;
— Cultivate accuracy in work;
— Develop creativity, imagination, encourage creative discoveries and children’s desire to independently decide on an image;
— Cultivate interest in Russian folklore and riddles.
Preliminary work: examining subject pictures from the “Vegetables” series, coloring coloring books with vegetables, the didactic game “Wonderful Bag”, learning finger exercises.
Equipment: Envelope with a letter, plasticine, stacks, modeling boards, models of vegetables, teaching material on the topic “vegetables”.
Progress of the lesson:
Educator: Guys, autumn has come, time to harvest vegetables .
(Knock on the door). The teacher brings an envelope with a letter.
- Look, they brought a letter from the forest from the Hare’s mother. They got into trouble. An evil Crow flew to their beds and the entire harvest with it. Now Mama Hare will be left with her bunnies without tasty and healthy vegetables.
— They sent us a sad letter. Guys, do you think we can help the Hare?
(listen to the children's answers)
Educator: Guys, today I suggest you make a garden with a harvest for the bunnies. Let's take a closer look at vegetables. Children look at dummies and images of vegetables, the “Vegetable Garden” poster, specifying the features of their appearance (structure and coloring, shape of leaves, how vegetables grow in the garden bed)
Before we get to work, let's warm up a little.
Physical exercise "Vegetables"
One, two, three, four, (Walking in place)
Children learned vegetables: (Jumping in place)
Onion, radish, zucchini, (Tilts left and right)
Horseradish, carrots, garlic (Hand clapping)
Children are invited to the tables. There is plasticine and boards on the tables, the teacher explains the sequence of work.
Explanation and demonstration of the sequence and techniques of sculpting:
Making tomatoes:
We make a ball from red plasticine. We make a flat cake from dark green plasticine. Cut out a star from the flatbread. We connect the details. We bend the leaves slightly upward. We sculpt a twig from dark green plasticine.
Making the eggplant:
We make a ball from purple plasticine. Then we pull it out a little to make a droplet. We make a star from dark green plasticine, as for a tomato. Only fold the eggplant leaves down. Let's make a small branch.
Making cabbage:
To sculpt cabbage, prepare and knead green plasticine in your hands. Divide the prepared piece into small slices for sculpting cabbage leaves. Mash each slice in your hands, then press it on top with your fingers and stretch it to form thin oval-shaped cakes. Leave one part in the form of a ball. Make a ball with the center of the fruit, and stick leaves around it in the shape of a green rose.
Making carrots:
To sculpt carrots you need green and orange plasticine. The fruits of this vegetable are oblong cone-shaped pieces that have pimples. To show them, use the stack again and pierce the soft plasticine in a random order. Make oblong leaves from green plasticine. Attach the leaves to the fruits.
Finger gymnastics "Cabbage"
We chop and chop the cabbage (swinging movements with our hands, like an ax
We knead the cabbage, knead the cabbage, (“knead the cabbage”)
We salt and salt the cabbage (“take” a pinch of salt and “salt”)
We press and press cabbage. (flexion and extension of the hands)
The teacher instructs each child to sculpt their own beds so that the garden is “rich.” The children choose a material and begin to sculpt while listening to calm music. As I work, I help children who have difficulty choosing sculpting methods.
Source
Tomato
There is nothing easier than making a tomato! Even three-year-olds can cope with this task.
Again, you need to start with blanks. First we make the fruit, for which we roll a ball of red plasticine. Now we make a green stem with leaves in two stages: first, you need to roll a ball from a material of the corresponding color, then use two fingers to pull out five short sausage-leaves from it.
The last step is to collect our tomato, that is, we simply attach a green stem with leaves to a red ball. If everything is done correctly, you will get a vegetable like the one in the picture below.
Summary of GCD for modeling in the senior group “Vegetables”
Gulperi Magomedova
Summary of GCD for modeling in the senior group “Vegetables”
sculpting techniques , rolling, stretching, pressing.
vegetables) from life , conveying their character and features;
2) Develop an eye;
3) Strengthen the skills of careful modeling (do not throw plasticine around, do not stain clothes)
4) Cultivate interest in Russian folklore and riddles.
Equipment: Plasticine, stacks, backing board, napkin, dummies of vegetables .
-show your child how to work with a piece of plasticine
-help the child with difficulty
Bananas
Making bananas from yellow plasticine is very easy! First you need to roll two thick, elongated sausages and bend them slightly. Then, with a sharp object (for example, a toothpick), draw several longitudinal shallow grooves along them. Now make the sausage thinner and shorter with a small extension in the middle. Stick two bananas to this shoot and you get a bunch.
If you did everything correctly, your playdough bananas will look like the picture above.