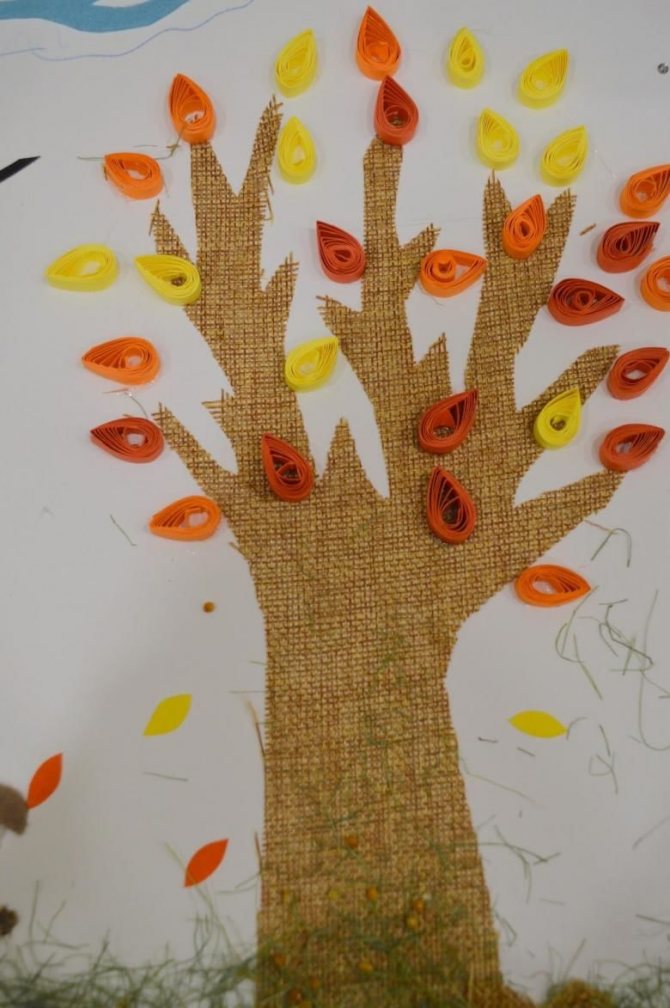
Autumn forest made from rolled strips of paper
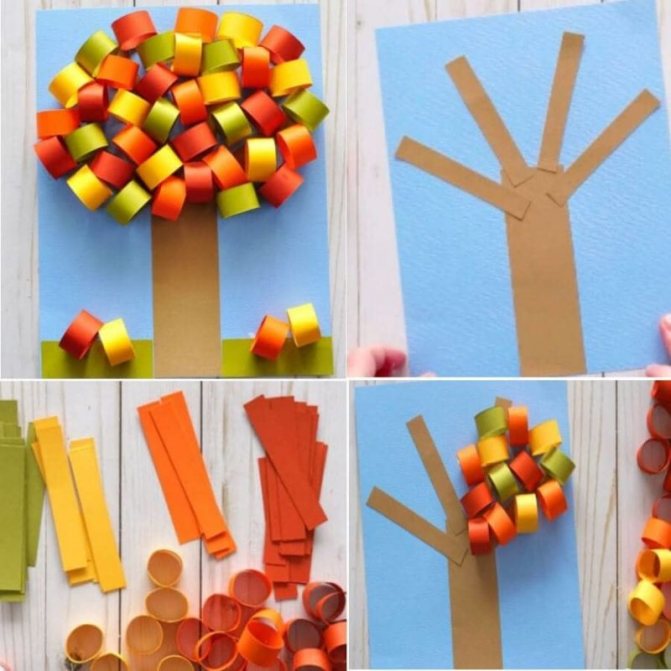
Prepare an autumn background for the application and determine the location of the trees on the sheet.

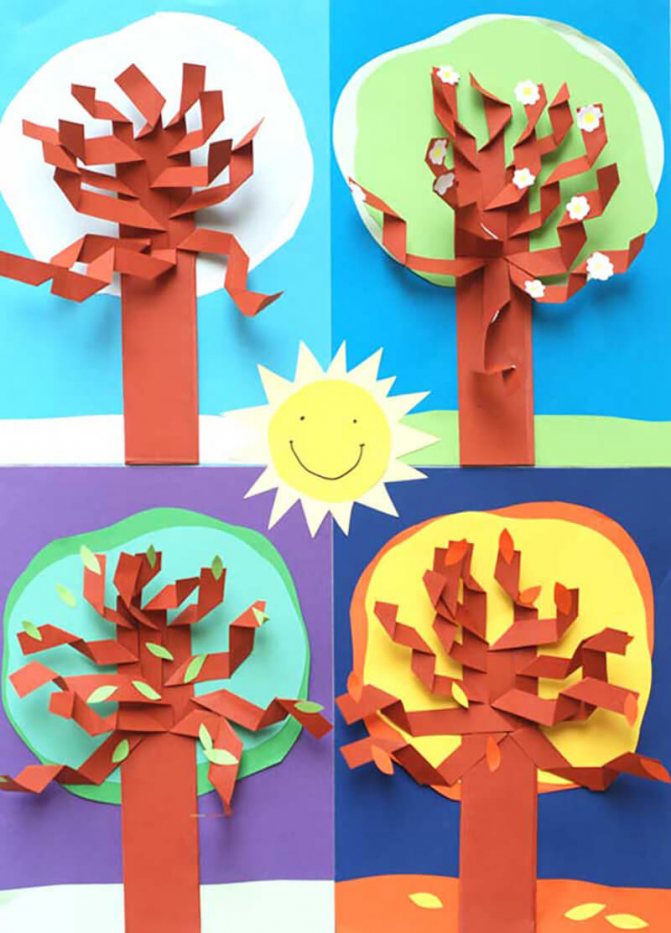
Three-dimensional trees can be made in three ways.
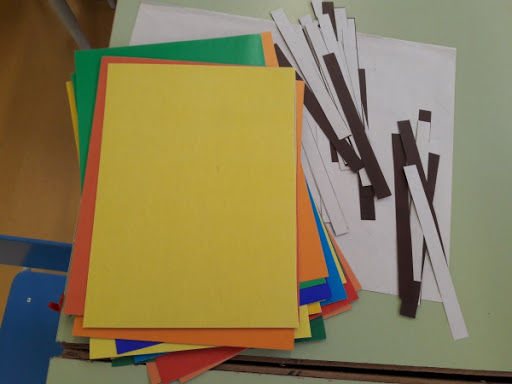
The first method: cut strips of 1x5 centimeters from colored paper in autumn shades. We glue each strip into a ring, the colored side out. Glue the resulting rings sideways onto the trunk in a chaotic manner. Try to glue so that the joint line is hidden at the bottom.
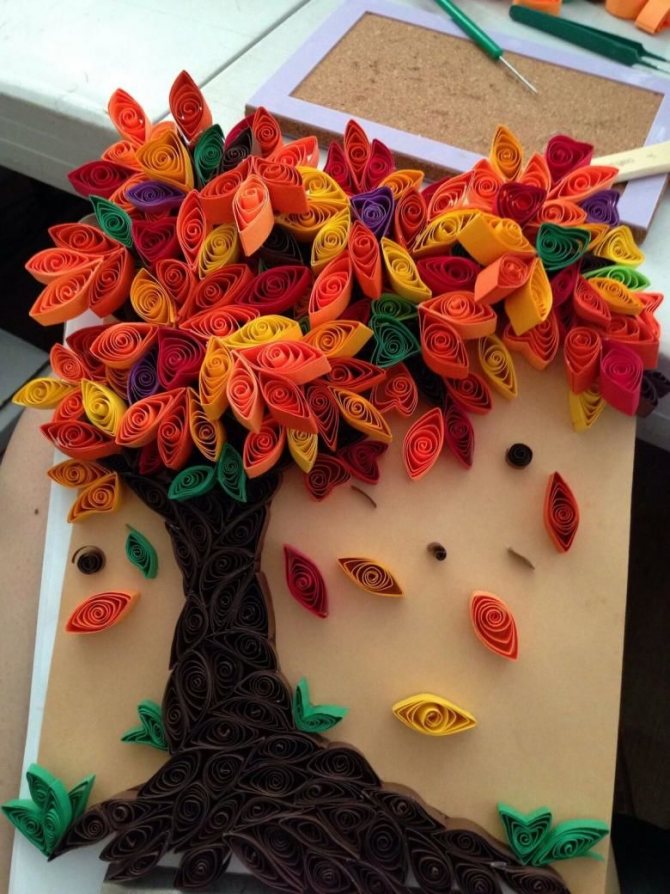
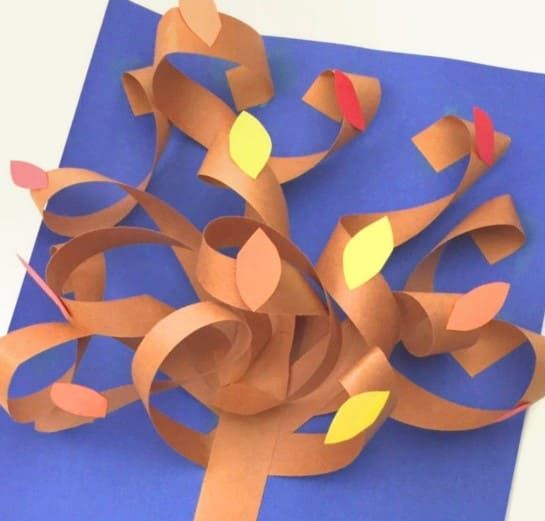
Second method: Cut a strip of paper 1.5x20 centimeters and wind it in a spiral around a pencil. Make 10 spirals in this way and glue them to the paper, placing them like rays from one point in the center of the trunk.
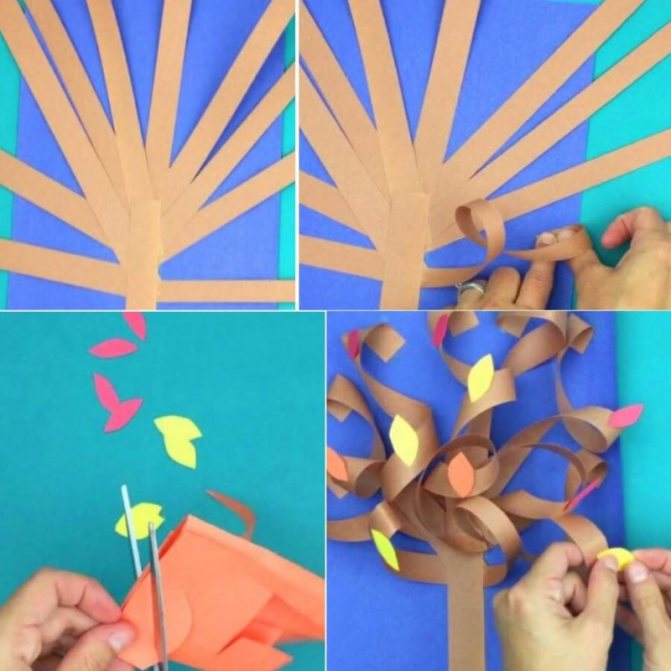
Glue smaller leaves on top of each spiral. Leaves can be cut out using a template or punched out with a hole punch.
Third method: willow or birch. Cut out many strips of 0.5 x 20 centimeters and screw them very tightly onto a toothpick so that you almost get a tube. Draw a willow or birch trunk with drooping branches. Glue the resulting spirals to the ends of the branches.
Autumn forest applique made from cotton pads
This technology is perfect for children aged three years and older. Since the disks are quite large, this method is more suitable for single trees. Prepare red, orange and yellow paints. For this craft, it is better to use gouache, as watercolor will give lighter colors.
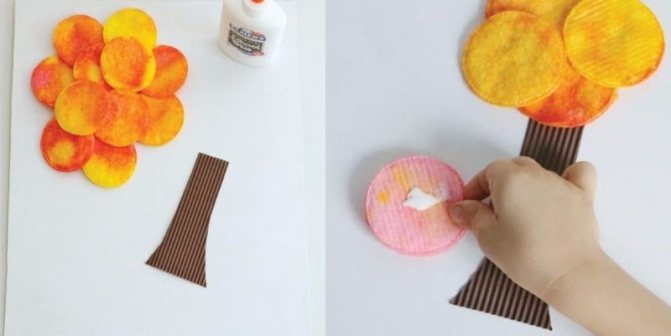
Paint 10-15 discs and dry. You can paint with a brush or dilute the paints and drip from a pipette. If you use several colors on one disk, the colors will mix with each other and give new shades, which will allow you to more fully convey the color scheme of autumn.
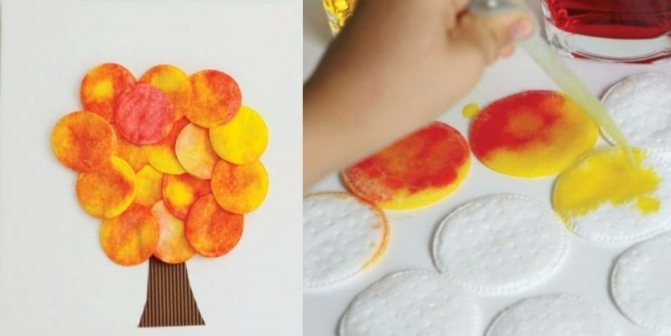
Glue the barrel onto a sheet of paper and painted cotton pads on top.
Applique autumn forest from other materials
You can use many materials to create a beautiful and unusual applique. It all depends on the desire and capabilities of the master.
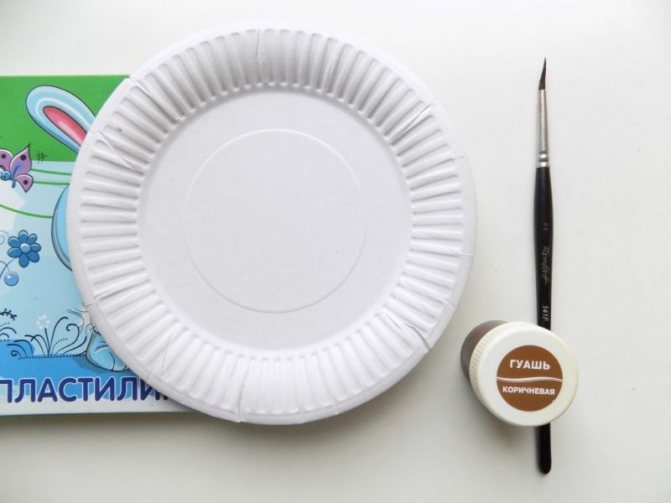
Application from plasticine
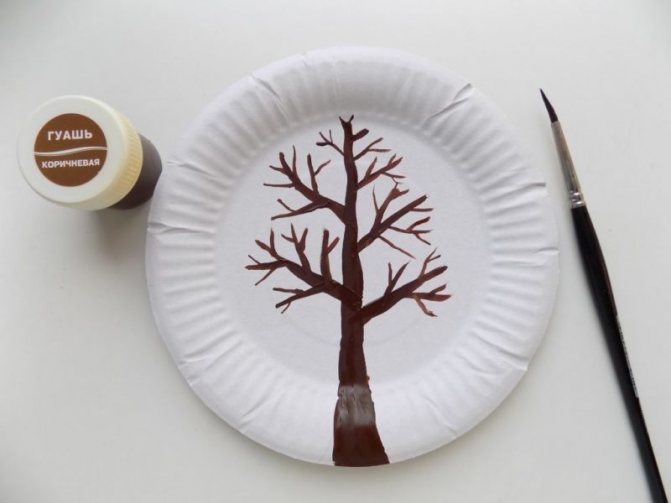
Since plasticine is quite heavy, applique requires a solid base, such as cardboard or fiberboard. You can use a disposable plate. You need the softest plasticine so that it spreads easily.
For the background, roll out two green sausages and one light brown one, then assemble them into one sausage without kneading. Tear off pieces and spread where the soil should be.
There is no need to mix the colors into one; let the effect of chaotic spots remain, as if part of the grass has already dried out. Smear blue across the sky, occasionally adding white.
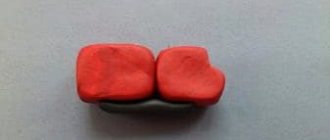
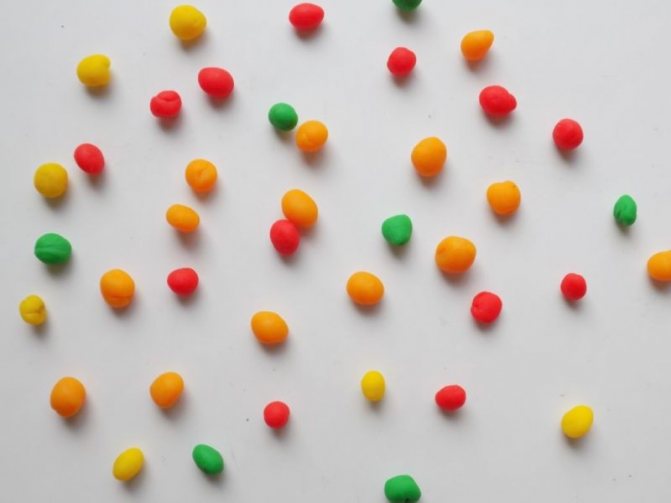
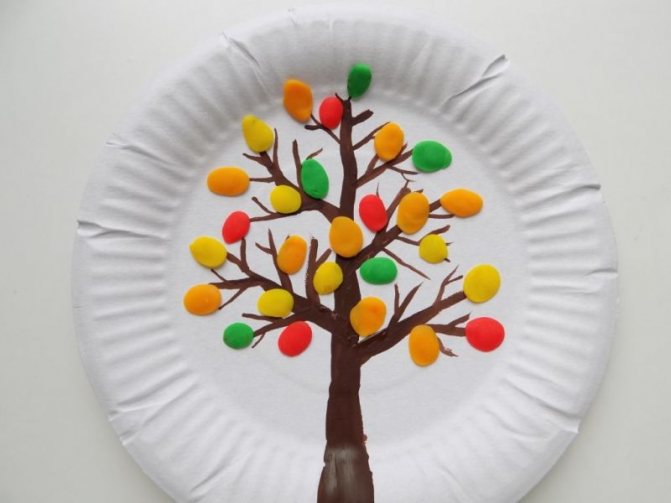
Sculpt or paint with gouache. Roll many 5mm balls in the color of autumn foliage. Each ball must be attached to the base and squeezed to form a flat cake.
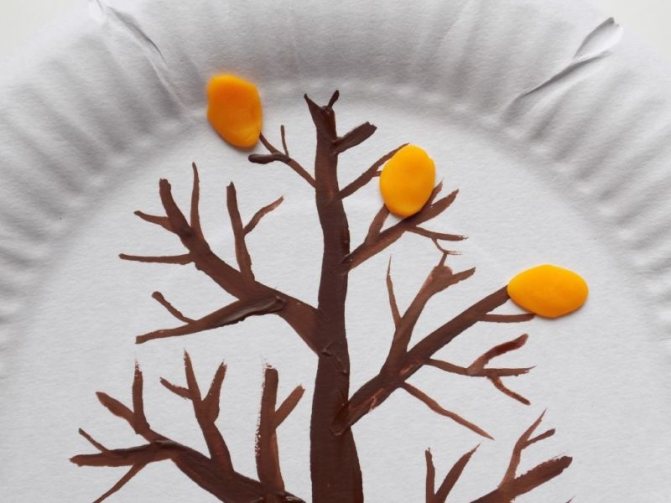
Use these flatbreads to fill the space of the tree crown. You can make mushrooms from white and brown plasticine and place them between the trees.
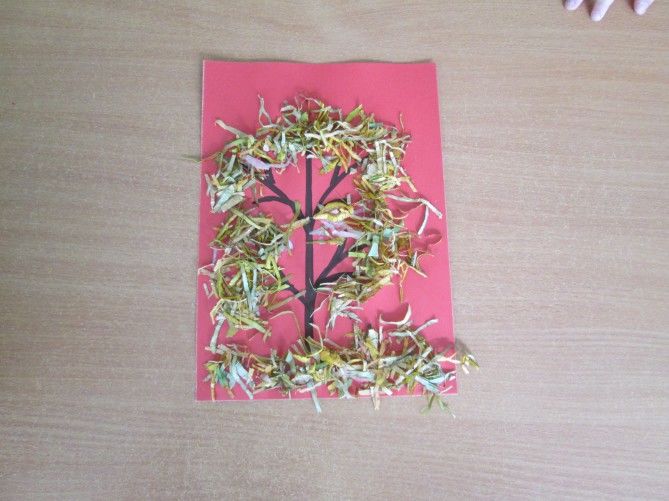
Cereal application
For the “Autumn Forest” applique you need buckwheat, millet, wheat and other cereals. The paper should be thick enough, since you will have to use a lot of PVA glue, and the thin paper will get wet.
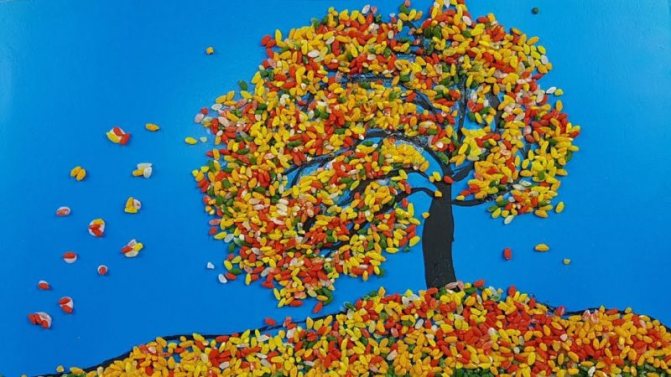
It is better to paint the background and contours of the trunks. Apply glue to the tree crowns and sprinkle with cereal. You can use a separate type of grain for each tree or mix all grains together. The work should lie until the glue dries completely.

A craft with seeds is made in a similar way. Pumpkin seeds are painted with gouache in the colors of the autumn palette, and then glued to the base.
To develop children's imagination, invite your child to choose his own materials for crafts. For example, paper can be replaced with fabric or felt. Let your child get acquainted with different textures and materials.
It is in early childhood that the child’s imagination develops most actively. Don't miss this moment and grow a creative person.
Volumetric applique of autumn forest
This method requires some skills and is accessible to children of primary school age.

Take white birch paper and draw black marks. For a voluminous central trunk, cut a strip of 9x17 centimeters and screw it into a tube onto a marker, gluing the edge so that the tube retains its shape.
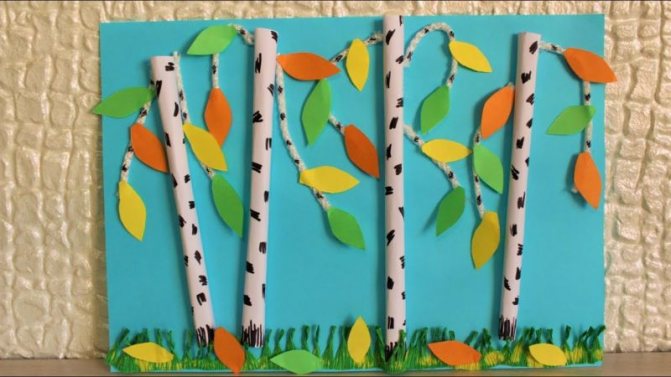
Attach strips of 10x4 centimeters in the same way, using a pencil, to get thinner tubes. Roll the paper along the long edge, so you will get a thick tube 17 centimeters long and several thin ones 10 centimeters long.
Glue them in the form of a central trunk with branches on the sides. Using a template or a hole punch, cut out leaves from paper in autumn shades and attach them evenly along the branches.
For originality, you can add autumn fruits, such as apples.