Progress of the lesson:
I call the children over and ask:
— Guys, do you like to travel ? (Yes)
— What can you go on a trip ? (by car, train, plane)
— What kind of transport do you think can be used to fly to other planets? (on a rocket, spaceship )
— What is the name of a person who makes a space flight ? ( astronaut )
- On April 12, 1961, for the first time a person rose so high that he could “reach out to the stars with his hand”
.
Yuri Alekseevich Gagarin became the first cosmonaut on the planet .
— Now let’s look at the illustrations that depict space . Tell us what we see? (Gagarin, rocket, space station , planets, stars)
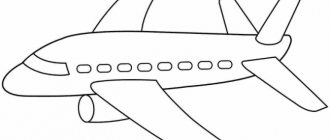
- Let's look at the rocket, what parts does it consist of? What does a rocket have? (hull, wings, windows)
.
— Why does the rocket have a sharp tip near the body? (So that the rocket can fly faster, the sharp tip cuts through the air)
— The windows in a rocket are correctly called portholes. “portholes”
together (children repeat the word)
.
— Why does a rocket need wings? (to fly)
.
- How do we know that the rocket is flying? (That's right, fire comes from the wings)
.
— What shape is the body? (rectangular)
.
What shape are the wings and upper body? (triangular)
.
What shape are the portholes? (round)
.
Showing the way to depict a rocket
— First I draw the rectangular body of the rocket. He's quite large. The rocket can fly in any direction you want. Then I triangular tip and triangular wings. Then we draw round portholes. Remember that the rocket body and windows must be different colors so that they do not merge.
I ask the children:
— What else needs to be drawn in outer space ? (moon, stars, planets in outer space )
. I show you how to draw the moon.
Before we start drawing , let's play.
In space through the thickness of years
(They clench and unclench their fingers.)
An icy flying object.
(Raise a clenched fist, tilt it left and right.)
His tail is a strip of light,
( The open fingers of the second hand are attached - the “tail”
.)
And the object's name is comet.
(They clench and unclench their fingers.)
I ask the children:
— Where do you start drawing a rocket ? What shape is the body? What will you draw next? What shape will you draw the wings and tip of the rocket? Besides the rocket, what else can we draw?
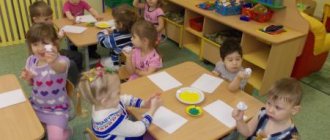
When children work independently, if necessary, we use an individual display on our sheet. I use passive actions.
Then I make an exhibition of the children’s work, call the children over and look at the work with them:
- Look at the colorful drawings you have made of your journey .
— Tell me what you drew about your journey ? (I ask several children)
.
- What a great fellow you all are, you did a good job . I liked all your drawings.
"Journey into Space." Summary of a lesson on plasticineography with children 4–5 years old Goals and objectives: 1. Expanding children's knowledge about space, planets and spaceships. 2. To generate interest in the work of creating space. Summary of an integrated lesson in the senior group “Travel into Space” Teacher of the senior group Selyukova V.S. Gostishchevo Purpose: To tell children about the importance of the work of astronauts. Clarify and expand ideas.
Summary of a comprehensive lesson in the middle group “Travel to Space” Preliminary work: – looking at illustrations and pictures, – holding a conversation about space, – asking riddles, – drawing a rocket.
Notes from a teacher-psychologist in the senior group “Journey into Space.” Lesson "Travel to Space". Goals. 1. Strengthen children's knowledge about space. 2. Consolidate knowledge about feelings of joy, sadness, surprise, anger. Summary of a drawing lesson in the senior group “Soldier” Program content: 1. Teach children to create the image of a soldier in a drawing. 2. Learn to convey the characteristic features of a soldier’s costume. Summary of the drawing lesson “They conquered space” Program content: 1. Learn to convey the characteristic features of an astronaut’s figure (posture, costume, attributes). 2. Consolidate children's knowledge.
Synopsis of the role-playing game "Journey into Space" for children of the senior group Synopsis of the role-playing game "Journey into Space" for children of the senior group Irina Vasilievna Tsviklo, teacher of the Nazyvaevsky MBDOU.
Summary of a lesson on mathematical development in the senior group “Journey into space” Summary of a lesson on mathematical development in the senior group. Topic: “Journey into space” Author: Team Tatyana Nikolaevna Purpose: formation.
Summary of a lesson on familiarization with the environment in the senior group “Space” Purpose: To expand children’s ideas about space and its exploration. Objectives: To introduce children to the history of the Cosmonautics Day holiday. Summary of a lesson on sand animation “Journey into Space” for children of senior preschool age Art Studio. Lesson Space. Goal: To consolidate the ability to draw the silhouette of a rocket in flight, to develop the ability to operate with ideas.
Source
GOALS• Teach children to draw with colored wax crayons on a white sheet of paper and then cover the entire sheet with gouache
• Strengthen skills in working with gouache
• Teach children to depict the starry sky, its appearance in airless space
• Teach children to pretend to be a rocket in flight
• Teach children how to spray
• Teach children to think through the composition and content of the drawing
• Teach children to use foreground and background space
• Teach children to convey the characteristic features of a spaceship in a drawing
• Develop skills in working with a brush and paints, skills in toning paper, painting with a brush
MATERIALS FOR THE CLASS
Wax crayons, gouache or black ink, brushes, large format paper, brushes (this could be toothbrushes) and spatulas.
PRELIMINARY WORK
With the children, look at the structure of the rocket in the pictures - the spacecraft cabin, stages, fuel tanks, nozzles.
Course of the lesson
Introductory conversation
The teacher reminds the children that in previous lessons there was a conversation about outer space surrounding the Earth. Questions that the teacher can ask during the conversation:
• Let's remember what the night sky looks like?
• Do you know what the sky looks like outside the earth's atmosphere, in airless space?
• Why does the sky seem blue to us during the day?
• What do stars look like in vacuum? (Stars can be red, yellow, white, blue.)
STAGE 1
Stars, comets, planets, Moon
We draw with wax crayons of different colors. The teacher explains to the children how to use the property of wax crayons: wax-coated surfaces do not retain water. First we depict the Moon - it is larger in size than the stars because it is closer to the Earth. Yellow onions. Children should be reminded that spots on the surface of the Moon are lunar craters and lunar maria. Then we draw comets, followed by a trail of gases - a tail. Lastly, we depict stars with small circles and dots.
STAGE 2
Space
After the stars are drawn, children cover the entire sheet of paper with black gouache or ink using a brush. The liquid paint rolls off from the areas covered with wax, creating an image of a starry sky.
To depict the starry sky, you can use the scratch-and-splash technique. Place a brush over the dried sheet, dipping it in white or yellow paint. We run a spatula over the brush, sprinkling drops of paint onto the paper. This technique must be used very carefully to avoid splashes on clothing or other surfaces.
STAGE 3
The rocket flies to the stars
After the paint has dried a little, you can begin to depict the rocket, its stages, nose and nozzles.
While drawing, the teacher can turn on soft, light instrumental music.
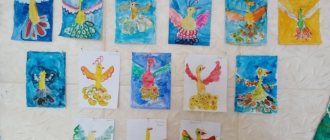
When the drawing is finished, the children's work is placed on display. The teacher asks the children to talk about their drawings.
On the topic: methodological developments, presentations and notes
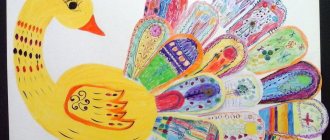
Program tasks: Strengthen the skills of drawing elements of Dymkovo painting (circles, dots, stripes, grid, ring, wavy arcs). Strengthen children's ability to create decorative compositions.
Objectives: To teach children to embody their ideas about primroses (snowdrops, scillas) in artistic form. Improve applicative technique. Form compositional skills. Develop feelings
Drawing in unusual ways and using materials that surround us in everyday life evoke great positive emotions in children; they are eager to draw, create and create.
Goal: Drawing a plant - an oak tree. Educational objectives: - Learn to draw plants; correctly convey the structure: oak: a bush plant with blooming red flowers; transmit vel.
Drawing in unusual ways and using materials that surround us in everyday life evoke great positive emotions in children; they are eager to draw, create and create.
Educational activities on artistic and aesthetic development (drawing). Summary of a drawing lesson in the senior group “The house in which I live” Educational field: art.
Source